![]()
![]()


![]()

![]()
![]()
![]()

![]()
![]()
Amulet µHTML pages can be created using standard HTML. There are some user interface (UI) objects that are supported by HTML. An overview of these objects can be found in Objects.htm. However, there are a group of UI objects common to embedded systems that are not supported by standard HTML. We refer to these UI objects as Amulet Widgets. Currently, there are fourteen Amulet Widgets available:
|
|
Bargraph Widget A live bargraph that represents the value returned from a function call. The bargraph moves from left-to-right, right-to-left, bottom-to-top, or top-to-bottom. Click here for a detailed description of Bargraph. |
|
|
Checkbox Widget A checkbox is a labeled, square box used to invoke a function (or set of functions) whose argument is the value of the checkbox. Checkboxes can also be grouped to invoke functions whose argument is the ORed value of all checked boxes within the group. All checkboxes that have the same groupName are considered part of a checkbox group. To toggle (check or uncheck) a checkbox, click on the checkbox (or label). Click here for a detailed description of Checkbox. |
|
|
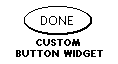
Custom Button Widget Two images (a pressed and a not pressed) are used to create a custom button. When pressed, the button invokes a function (or set of functions). Custom buttons can either be set up to be a toggle button or a spring-loaded button. Click here for a detailed description of Custom Button. |
|
|
Custom Slider Widget Three images (a channel and two handle states) are used to create a custom slider. A custom slider launches a function (or set of functions) upon a pen down or pen up event. As the "handle" is moved, the argument given to the function(s) changes (based on the minimum and maximum values specified). Click here for a detailed description of Custom Slider. |
|
|
Dynamic Image Widget An uncompressed image which provides a space holder to display images which can be loaded serially at runtime. Images are uploaded using an xmodem protocol. Click here for a detailed description of Dynamic Image. |
|
|
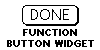
Function Button Widget A button used to invoke a function (or set of functions) when hit. Function buttons can either be set up to be a toggle button or a spring-loaded button. Click here for a detailed description of Function Button. |
|
|
Image Bar Widget Two images (an empty and a full) are used to create a custom "bargraph". A byte (or word) returned from a function call is the input. Based upon the value of the byte (or word) returned, a percentage of the empty bar and a percentage of the full bar are displayed. For further customization, the wipe between empty and full can be from left-to-right, right-to-left, bottom-to-top, or top-to-bottom. Click here for a detailed description of Image Bar. |
|
|
Image Sequence Widget Similar to an animated bitmap. However, instead of being linked to a timer event, the transition between images is linked to a byte (or word) returned from a function call. Click here for a detailed description of Image Sequence. |
|
|
Line Graph Widget A 2-dimensional line graph is drawn on a background image, which uses a byte (or word) array returned from a function call as its input. The line weight (thickness) is user-defined, as well as the number of samples in the x direction and the sampling rate. Click here for a detailed description of Line Graph. |
|
|
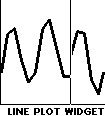
Line Plot Widget A live 2-dimensional line plot which uses a byte (or word) returned from a function call as its input. The line weight (thickness) is user-defined, as well as the number of samples in the x direction and the sampling rate. The line plot moves from left-to-right only. Click here for a detailed description of Line Plot. |
|
|
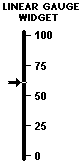
Linear Gauge Widget Two images (a background and pointer icon) are used to create a custom "linear gauge". A byte (or word) returned from a function call is the input. The pointer icon travels the length of the background image based upon the value of the byte (or word) returned. The pointer can travel either horizontally or vertically. Click here for a detailed description of Linear Gauge. |
|
|
List Widget A list of user-defined strings linked to a single function (or set of functions). Selecting an object within the list invokes the function(s), with the argument being the value of the list entry selected. Click here for a detailed description of List. |
|
|
Numeric Field Widget A live numeric field that uses a byte (or word) returned from a function call as its input. Static text can also be added to the "live" numeric field, using the standard C printf format. Hexadecimal, integer, and floating-point display formats are all supported. Click here for a detailed description of Numeric Field. |
|
|
Radio Button Widget A labeled round button used to make a single selection from several options. When a radio button is hit, its function(s) are called with the argument being the intrinsic value of the radio button. Each radio button can invoke its own function (or set of functions). Click here for a detailed description of Radio Button. |
|
|
Scribble Widget A canvas used for freehand drawing. A background image can be included. It includes a method to send out the raw image data out the serial port using an xmodem protocol. Click here for a detailed description of Scribble. |
|
|
Slider Widget A slider launches a function (or set of functions) upon a pen down or pen up event. As the "handle" is moved, the argument given to the function(s) changes (based on the minimum and maximum values specified). Click here for a detailed description of Slider. |
|
|
String Field Widget A live string field that displays dynamic text based upon an ASCII string received from a function call. An alternative setup returns a byte used to index a list of pre-built strings. Static text, surrounding the dynamic string, can also be added to the "live" string field, using the standard C printf format. Click here for a detailed description of String Field. |
Amulet widgets are entered into HTML pages using the Java applet tag. However, Amulet widgets ARE NOT written in Java. They use the Applet tag so that drag-and-drop HTML editors will accept the source code. In addition, most drag-and-drop HTML editors provide some form of an EDIT PARAMETERS dialog box associated with the Applet tag. This makes it easier to edit the Amulet Widget parameters for your specific needs.
To simplify the task of incorporating Amulet Widgets in your pages, a drag-and-drop library of Amulet Widgets is included with the Easy GUI Development Software. The library is in the form of an HTML file called Library.htm and is located in a subdirectory of the Amulet main directory called \Library\. By default, the Amulet main directory is C:\Program Files\Amulet, however you may have specified a different path during the install.
Amulet widgets use the following applet attributes:
To provide arguments to an applet, the <param> tag is used. The <param> attributes are, as follows:
NAME="text" Specifies the parameter name, which is defined by the widget. Each widget has its own set of parameter names.
VALUE="number" and/or "text" Specifies the parameter value identified with the NAME attribute. Each parameter name has a set of values. Depending on the parameter, the value can be numeric or textual.
Integers can be entered in hexadecimal or decimal. Decimal examples are used in this document. If hexadecimal is desired, precede the number with 0x. For example:
<A HREF="Amulet:UART.invokeRPC(10)">Click for RPC #10</A>
is equivalent to
<A HREF="Amulet:UART.invokeRPC(0x0A)">Click for RPC #10</A>
The intrinsic values for most Control Widgets can be either a BYTE, WORD or STRING. The exceptions to this are the slider widget and the grouped check box widget, which can only have numbers (BYTES or WORDS) for their intrinsic value. If the href function call is BYTE specific, (i.e. Amulet:UART.byte(5).setValue()), then the range of the intrinsic value should be 0-255(0x00-0xFF). You can alternately specify a BYTE by putting an ASCII character between single quotes (i.e. 'A', which would be the BYTE equivalent of 0x41 or 65 decimal.)
If the intrinsic value can become greater than 255, then you should use WORD specific function calls. If the href function call is WORD specific, (i.e. Amulet:UART.word(5).setValue()), then the range of the intrinsic value is 0-65535(0x0000-0xFFFF).
If the href function call is STRING specific, (i.e. Amulet:UART.string(5).setValue()), then the intrinsic value should be specified between double quotes (i.e. "My string"). The maximum length of a string value is 254 characters. Unfortunately, because double quotes are used as a token separator in HTML, just putting in double quotes in the HTML will not work. It will usually work in most HTML editor front ends for editing Applet parameters, though. If dealing with the actual HTML source code, there are three ways to specify a STRING value.
1) Use single quotes as the token separator around the entry that
has the double quotes around the STRING.
Example: <PARAM NAME="href"
VALUE='Amulet:UART.string(5).setValue("My string")'>
2) Use single quotes as the quotes around the STRING. Note: if single quotes
are around a single character, the Amulet HTMLCompiler will assume a BYTE instead
of a one character string, so if a one character string is desired, do not use
this method.
Example: <PARAM NAME="href" VALUE="Amulet:UART.string(5).setValue('My
string')">
3) Use the HTML escape character for double quotes (") around the
STRING.
Example: <PARAM NAME="href" VALUE="Amulet:UART.string(5).setValue("My
string")">
If you are using an advanced HTML editor, like NAMO or DreamWeaver, inserting the double quoted string in the front end of the applet editor will result in the HTML looking like one of the above methods. In that case, just put double quotes around your STRING value and the HTML editor will take care of the rest.
A Bargraph Widget is a live bargraph that represents the byte (or word) value returned from a function call. The bargraph moves from left-to-right, right-to-left, bottom-to-top, or top-to-bottom.
NAME="href" VALUE="function" The function called to retrieve the widget input. See Appendix B for all available functions for the Bargraph Widget. The function is called at an update rate specified by the updateRate attribute.
NAME="min" VALUE="number" Minimum value returned from the href function; must be less than max. If the function returns a byte, the range is 0 - 254 (0x00 - 0xFE). If the function returns a word, the range is 0 - 65534 (0x00 - 0xFFFE).
NAME="max" VALUE="number" Maximum value returned from the href function; must be greater than min. If the function returns a byte, the range is 1 - 255 (0x01 - 0xFF). If the function returns a word, the range is 1 - 65535 (0x01 - 0xFFFF).
NAME="fillPattern" VALUE="number" Specifies the desired bargraph fill pattern. Sixteen different fill patterns are available (0 through 15), Figure 1. If no fill pattern is specified, the default is pattern 0.
|
|
|
|
|
|
|
|
|
|
|
|
|
|
|
|
|
|
|
|
Figure 1. Bargraph widget fill patterns (values 0 through 15).
NAME="sweepFrom" VALUE="LEFT"|"RIGHT"|"TOP"|"BOTTOM" Determines where to begin drawing the bargraph. The options are:
- LEFT The bargraph is drawn from left-to-right.
- RIGHT The bargraph is drawn from right-to-left.
- TOP The bargraph is drawn from top-to-bottom.
- BOTTOM The bargraph is drawn from bottom-to-top.
NAME="updateRate" VALUE ="1st number, 2nd number" The first number specifies the href function call frequency (specified in seconds, with a single floating-point number). The range is 0.00 - 655.35. A value of 0.00 means update never. The second number specifies the delay time from when the page is loaded until the first href function call (specified in seconds, with a single floating-point number). The range is 0.01 - 655.35. If the second number is not specified, then the delay time defaults to the first number (frequency).
NAME="invisible" VALUE="TRUE"|"FALSE" Specifies if the Bar Graph is to start out invisible or not. If the attribute is not present, then by default the Bar Graph is visible. If the Bar Graph starts out invisible, the only way to make it visible again is via the IWC method "reappear()".
Use the BarGraph.class applet to create a bargraph. For example, to create a bargraph 260 pixels wide and 30 pixels tall that sweeps left-to-right, updates every 200ms, starts 10ms after the page is loaded, and is linked to external byte variable 3 with a range of 0 - 255, use the following:
<APPLET CODE="BarGraph.class" WIDTH="260" HEIGHT="30" NAME="Bar1">
<PARAM NAME="href" VALUE="Amulet:UART.byte(3).value()">
<PARAM NAME="min" VALUE="0">
<PARAM NAME="max" VALUE="255">
<PARAM NAME="fillPattern" VALUE="6">
<PARAM NAME="sweepFrom" VALUE="left">
<PARAM NAME="updateRate" VALUE=".20,.01">
</APPLET>
See the \projects\Examples\BarGraph\ directory for an HTML file showing an example bargraph widget.
A checkbox is a labeled, square box used to invoke a function (or set of functions) whose argument is the value of the checkbox. To toggle (check or uncheck) a checkbox, click on the checkbox (or label). Checkboxes can also be grouped to invoke functions whose argument is the cumulative value of all checked boxes (logical ORing). Boxes that have the same groupName are considered part of a checkbox group.
Within a checkbox group, any combination of boxes can be checked. If none of the boxes are set within a group, then 0x00 is the href function call argument. Therefore, you must give each box a checked value that is different on a binary bit level. If one box has a checked value of 0x01, then another box could have a value of 0x02, and the next a value of 0x04 (not 0x03 because that would be the ORed value of boxes 1 and 2 when checked).
NAME="href" VALUE="function(s)" The function (or multiple/sequenced functions) invoked when a checkbox is toggled (checked or unchecked). If the checkbox is NOT part of a checkbox group, the argument of the function is determined by the state of the checkbox. If checked, the argument is determined by the checkedValue parameter; if unchecked, the argument is determined by the unCheckedValue parameter. If the checkbox is part of a group, the argument is the cumulative value of all "checked" boxes (logical ORing). All checkboxes within a group must call the same href function(s). See Appendix B for all available href functions for the checkbox widget.
NAME="font" VALUE="font" Specifies the font used for the checkbox label. The corresponding .amf file must be included in the Amulet/Configuration/Fonts folder. See AmuletFontConverter for more information regarding the creation of .amf files. Default is Amulet Sans Serif.
NAME="fontSize" VALUE="1"|"2"|"3"|"4"|"5"|"6"|"7" Specifies the font size for the checkbox label. The assigned values are:
- 1 = 8-point font
- 2 = 10-point font
- 3 = 12-point font
- 4 = 14-point font
- 5 = 18-point font
- 6 = 24-point font Note: font size 6 for Amulet Sans Serif not supported.
- 7 = 36-point font Note: font size 7 for Amulet Sans Serif not supported.
NAME="fontStyle" VALUE="PLAIN"|"BOLD"|"ITALIC"|"UNDERLINE"|"STRIKE" Specifies the style associated with the checkbox label font. To create a custom look, styles can be combined by using the "logical or" (|). However, PLAIN overrides any other style. The available font styles are:
- PLAIN The option text uses the standard font.
- BOLD The option text is bold. (i.e. text)
- ITALIC The option text is italicized. (i.e. text)
- UNDERLINE The option text is underlined. (i.e. text)
- STRIKE The option text is stricken through. (i.e.
text)NAME="boxAlign" VALUE="LEFT"|"RIGHT" Specifies the location of the checkbox in relation to the label text.
NAME="label" VALUE="text" Specifies the name that appears to the right or left of the checkbox.
NAME="checkedValue" VALUE="number" Specifies the checked box value. If the box is part of a group, single bits should be used, such as 0x01, 0x02, 0x04 etc. All boxes within a checkbox group must be assigned unique binary numbers. That is, if one checkbox has a value of 0x01(bit 0), no other checkbox within the group can use bit 0. If the box is part of a group, the range is 1 - 255 (0x01 - 0xFF). If a lone box, the checkedValue can be a BYTE, WORD or STRING. See note regarding Control Widget intrinsic values.
NAME="unCheckedValue" VALUE="number" Specifies the unchecked box value. This attribute is only valid when NOT part of a checkbox group. The checkedValue can be a BYTE, WORD or STRING. See note regarding Control Widget intrinsic values.
NAME="groupName" VALUE="text" For a grouped checkbox, specifies the checkbox group assignment. Attribute not needed if a lone checkbox.
NAME="initialCondition" VALUE="ON"|"OFF"|"FromInitHref" Specifies the initial condition of a checkbox when the page is loaded; ON specifies a checked box; OFF an unchecked box. If FromInitHref is selected, the function specified by the initHref attribute is called. The returned value determines the initial condition of all checkboxes within the group. If part of a group, a box is checked when its checkedValue corresponds to a set bit in the returned byte (logical ANDing). If a lone checkbox, the box is checked when its internalNumber equals the returned initHref value.
NAME="initHref" VALUE="function" Specifies the function called when the page is loaded. Use this attribute when FromInitHref is used as the initialCondition. All boxes within a group must have the same function(s). If part of a group, the function must return a BYTE value, and the value returned is compared to the checkedValue. If the checkedValue bit is set in the returned value, the box will initially start out in the "on" position. If a lone check box, then the returned value is compared to the internalNumber and if equal, the lone check box initially starts out in the "on" position. See Appendix B for all available functions.
NAME="hrefOnHitOnly" VALUE="TRUE"|"FALSE" Specifies if the check box href function(s) is launched only upon a "hit" or not. By default, hrefOnHitOnly is false, which means if the check box has an initHref function, the href of the check box (group or lone) is launched upon loading the page. The href is also launched after a forceUpdate() call. By setting hrefOnHitOnly to true, the href will only be launched upon the check box physically being selected or upon a forceHit() call.
NAME="emptyImage" VALUE="image" Specifies the image to use when the checkbox is in the unchecked state. If this attribute is not present, then a default image, emptyImage.gif, located in Amulet/Configuration/Widgets/CheckBox/, is used. (Images can be either .GIF or .JPEG.)
NAME="trackingImage" VALUE="image" Specifies the image to use when the checkbox is in the pen down state. If this attribute is not present, then a default image, trackingImage.gif, located in Amulet/Configuration/Widgets/CheckBox/, is used. (Images can be either .GIF or .JPEG.)
NAME="fullImage" VALUE="image" Specifies the image to use when the checkbox is in the checked state. If this attribute is not present, then a default image, fullImage.gif, located in Amulet/Configuration/Widgets/CheckBox/, is used. (Images can be either .GIF or .JPEG.)
NAME="invisible" VALUE="TRUE"|"FALSE" Specifies if the Check Box is to start out invisible or not. If the attribute is not present, then by default the Check Box is visible. If the Check Box starts out invisible, the only way to make it visible again is via the IWC method "reappear()".
NAME="internalNumber" VALUE="number" Specifies the internal number of the lone checkbox, which is used to determine if the initial condition of the lone check box is on or off, if FromInitHref is used as the initialCondition. Should only be used if using initHref. If the value returned from the initHref function matches the internalNumber of the lone check box, then the check box starts out in the "on" position. If the internalNumber is not specified, the checkedValue is used instead.
Use the CheckBox.class applet to create a checkbox. For example, to create a checkbox 150 pixels wide and 22 pixels tall that is positioned left of the label "Box 1", and whose checked value is 0x20 and unchecked value is 0x10, sets the value of external byte variable 5, and with an initial condition that is set by first requesting the value of external byte variable 5, use the following:
<APPLET CODE="CheckBox.class" WIDTH="150" HEIGHT="22" NAME="CB1">
<PARAM NAME="href" VALUE="Amulet:UART.byte(5).setValue()">
<PARAM NAME="fontSize" VALUE="3">
<PARAM NAME="fontStyle" VALUE="PLAIN">
<PARAM NAME="label" VALUE="Box 1">
<PARAM NAME="checkedValue" VALUE="0x20">
<PARAM NAME="unCheckedValue" VALUE="0x10">
<PARAM NAME="boxAlign" VALUE="left">
<PARAM NAME="groupName" VALUE="CB1">
<PARAM NAME="initialCondition" VALUE="FromInitHref">
<PARAM NAME="initHref" VALUE="Amulet:UART.byte(5).value()">
</APPLET>
See the \projects\Examples\CheckBox\ directory for an HTML file showing an example check box widget.
The Custom Button Widget uses two images (a pressed and a not pressed) to create a custom button. Custom buttons are Amulet anchors that allow a separate pressed image to appear instead of merely inverting the image. Custom buttons can be set to be either a "spring-loaded" or a "toggle" button. By default, when hit, a custom button invokes a function (or set of functions). Optionally, custom buttons can be set to auto-repeat while pressed. Initial delay and repeat frequency can both be customized.
Each custom button can have a user-defined label (text or numeric) within the button image. If the label is specified as "fromInitHref", the label will be based upon a string variable that is passed across the serial link at run-time. The label text will automatically wrap if the string exceeds the width of the custom button. User-defined wraps can be specified by entering "\n" at the point of the desired wrap.
Custom buttons can also be set up to auto-repeat. When pressed, an auto-repeat button delays a user-defined amount of time then invokes a function (or set of functions) at a user-defined frequency while the button is still being pressed. As a side benefit of the auto-repeat functionality, a button can be created that will appear to invoke its function(s) immediately upon being pressed instead of waiting until the button is released. To create an instant hit button, set the delay very small and the frequency at 0. The button will invoke its function(s) after the very short delay time and not repeat again.
NOTE: To display a literal \ symbol in the label, use a double backslash in the string (e.g. 25 \\ 5 would display 25 \ 5 within the button).
NAME="href" VALUE="function(s)" The function (or multiple/sequenced functions) invoked when the button is hit. See Appendix B for all available functions for the Custom Button widget.
NAME="font" VALUE="font" Specifies the font used for the button label. The corresponding .amf file must be included in the Amulet/Configuration/Fonts folder. See AmuletFontConverter for more information regarding the creation of .amf files. Default is Amulet Sans Serif.
NAME="fontSize" VALUE="1"|"2"|"3"|"4"|"5"|"6"|"7" Specifies the font size for the button label. The assigned values are:
- 1 = 8-point font
- 2 = 10-point font
- 3 = 12-point font
- 4 = 14-point font
- 5 = 18-point font
- 6 = 24-point font Note: font size 6 for Amulet Sans Serif not supported.
- 7 = 36-point font Note: font size 7 for Amulet Sans Serif not supported.
NAME="fontStyle" VALUE="PLAIN"|"BOLD"|"ITALIC"|"UNDERLINE"|"STRIKE" Specifies the style associated with the button label font. To create a custom look, styles can be combined by using the "logical or" (|). However, PLAIN overrides any other style, and UNDERLINE and STRIKE cannot be used together. The available font styles are:
- PLAIN The option text uses the standard font.
- BOLD The option text is bold. (i.e. text)
- ITALIC The option text is italicized. (i.e. text)
- UNDERLINE The option text is underlined. (i.e. text)
- STRIKE The option text is stricken through. (i.e.
text)NAME="label" VALUE="text"|"FromInitHref" Specifies the text that appears inside the button. The button will NOT automatically re-size to fit the text. If there is enough vertical room, text will automatically wrap. Any text that will not fit within the confines of the button will be truncated. User-defined wraps can be specified by entering "\n" within the text at the spot you would like the wrap to occur. There is a maximum of 5 lines for a button label. The name field can be left blank; blank is the default.
To have the label be dynamically entered at runtime by the server, enter FromInitHref. By default, the dynamic button label can be a maximum of 25 characters in length. To increase the maximum number of characters, put the desired number in parentheses after FromInitHref. For example, to have a dynamic label up to 50 characters long, use FromInitHref(50). The attribute initHref needs to be of the type Amulet:UART.label(x).value(). It will be called only once upon the loading of the page, with the string returned from the server becoming the button label. See note regarding the use of InternalRAM label variables as button labels.
NAME="buttonType" VALUE="TOGGLE"|"SPRING-LOADED" Specifies the action of the button when hit. TOGGLE causes the button to depress (or invert) on a pen down event and stay depressed on the ensuing pen up event. SPRING-LOADED causes the button to depress on a pen down event and return to its original state on the following pen up event. SPRING-LOADED is the default.
NAME="onButtonPress" VALUE="CUSTOM"|"INVERT" Specifies the look of the button during a pen down condition. CUSTOM causes the downImage to appear and label text, if any, to shift down and to the right to give the illusion of being pressed. INVERT inverts the upImage and prohibits the downImage from appearing. CUSTOM is the default.
NAME="upImage" VALUE="image" Image used when custom button is not pressed. Image file must be of type .GIF or .JPG.
NAME="downImage" VALUE="image" Image used when custom button is pressed. Image file must be of type .GIF or .JPG.
NAME="dualAction" VALUE="TRUE"|"FALSE" Specifies if the Custom Button is to launch the href function(s) twice, once upon pressing the button and once upon releasing the button. If the attribute is not present, then by default the Custom Button only launches its href function(s) upon release.
NAME="repeatDelay" VALUE="number" Time to delay from when button is initially pressed until it starts to auto-repeat. Specified in seconds, with a single floating-point number. The range is 0.01 - 655.35.
NAME="repeatRate" VALUE="number" The href function call frequency while button is being pressed, after the initial delay determined by repeatDelay. Specified in seconds, with a single floating-point number. The range is 0.00 - 655.35. 0.00 means do not repeat.
NAME="verticalAlign" VALUE="TOP"|"MIDDLE"|"BOTTOM" Specifies the vertical alignment of the string associated with the label attribute within the Custom Button dimensions. Only one value is allowed; you cannot mix vertical alignments. Default is MIDDLE.
NAME="horizontalAlign" VALUE="LEFT"|"CENTER"|"RIGHT" Specifies the horizontal alignment of the string associated with the label attribute within the Custom Button dimensions. Only one value is allowed; you cannot mix horizontal alignments. Default is CENTER.
NAME="invisible" VALUE="TRUE"|"FALSE" Specifies if the Custom Button is to start out invisible or not. If the attribute is not present, then by default the Custom Button is visible. If the Custom Button starts out invisible, the only way to make it visible again is via the IWC method "reappear()".
NAME="initHref" VALUE="function" Specifies the function called when the page is loaded. Use this attribute only when FromInitHref is used as the label. Only available function is of type Amulet:UART.label(x).value(). See note regarding the use of InternalRAM label variables as button labels.
Use the CustomButton.class applet to create a Custom Button. For example, to create a custom button that is 115 pixels wide and 35 pixels tall, uses the image myButtonUp.gif when not pressed, uses the image myButtonDown.gif when pressed, delays for 1.5 seconds while pressed before starting to auto-repeat, auto-repeats every 500 ms, and launches RPC #5, use the following:
<APPLET CODE="CustomButton.class" WIDTH="115" HEIGHT="35" NAME="CustomBtn1">
<PARAM NAME="href" VALUE="Amulet:UART.invokeRPC(5)">
<PARAM NAME="upImage" VALUE="myButtonUp.gif">
<PARAM NAME="downImage" VALUE="myButtonDown.gif">
<PARAM NAME="buttonType" VALUE="SPRING-LOADED">
<PARAM NAME="repeatDelay" VALUE="1.5">
<PARAM NAME="repeatRate" VALUE="0.5">
</APPLET>
To create a custom button that is 115 pixels wide and 35 pixels tall, uses the image myButtonUp.gif initially, displays myButtonDown.gif and launches RPC #1 when first hit, then displays myButtonUp.gif and launches RPC #2 when next hit, etc..., use the following:
<APPLET CODE="CustomButton.class" WIDTH="115" HEIGHT="35" NAME="CustomBtn2">
<PARAM NAME="href" VALUE="Amulet:UART.invokeRPC(1);Amulet:UART.invokeRPC(2)">
<PARAM NAME="upImage" VALUE="myButtonUp.gif">
<PARAM NAME="downImage" VALUE="myButtonDown.gif">
<PARAM NAME="buttonType" VALUE="TOGGLE">
</APPLET>
See the \projects\Examples\CustomButton\ directory for an HTML file showing an example custom button widget.
The Custom Slider Widget acts like a regular Slider Widget, except for the fact that you get to specify the channel image and two different handle images. The Custom Slider Widget invokes a function (or set of functions) either upon the hrefEvent parameter. If hrefEvent is setup as onChange, the slider invokes the function(s) whenever the handle moves. If hrefEvent is setup as onPenUp, the slider invokes the function(s) only upon releasing the handle. Touching anywhere on the channel causes the handle to snap to that location and invoke the function(s) with the corresponding argument. The argument is determined by the location of the handle and the limits setup with the min and max attributes. The location of the min value is determined by the minAt attribute(left, right, top or bottom). The height and width dimensions entered in the APPLET CODE Attribute Field determine whether the slider is horizontal or vertical. The longer dimension establishes the path that the slider handle travels.
An image, channelImage, is used as the slider's channel, which must be the same dimensions as the Custom Slider Widget. Two different images are used for the slider handle. One image, handleImage, is used when the handle is not touched, and another, handleTrackingImage, for when the handle is active. As an option, you can specify the offset of the handle from the center of the channel by using the handleOffset parameter.
Custom Slider Parameter Attributes:
NAME="href" VALUE="function(s)" The function (or multiple/sequenced functions) invoked upon the event specified in hrefEvent. See Appendix B for all available functions for the Slider widget.
NAME="hrefEvent" VALUE="onChange"|"onPenUp" The event which triggers the launching of the href function. If set to onChange, the slider will launch the function call whenever the handle is moved. If set to onPenUp, the slider will only launch the function call upon the releasing of the slider handle. If hrefEvent is not specified, the default is onChange.
NAME="min" VALUE="number" The minimum value used as the argument given to the function(s) specified in href. By default, minimum value is achieved when handle is full-left on a horizontal slider, or full-bottom on a vertical slider. The range is 0 - 65534 (0x00 - 0xFFFE).
NAME="max" VALUE="number" The maximum value used as the argument given to the function(s) specified in href. By default, maximum value is achieved when handle is full-right on a horizontal slider, or full-top on a vertical slider. The range is 1 - 65535 (0x01 - 0xFFFF).
NAME="minAt" VALUE=""LEFT"|"RIGHT"|"TOP"|"BOTTOM"" Determines where the minimum value of the slider is located. As the handle sweeps from the minAt location, the value increases until the maximum value is reached at the opposite extreme of the minAt location. Default values are LEFT for horizontal sliders and BOTTOM for vertical sliders. The options are:
- LEFT The slider value increases from left to right. (horizontal slider only)
- RIGHT The slider value increases from right to left. (horizontal slider only)
- TOP The slider value increases from top to bottom. (vertical slider only)
- BOTTOM The slider value increases from bottom to top. (vertical slider only)
NAME="handleImage" VALUE="image" Image used as the slider handle when not pressed. Image file must be of type .GIF or .JPG.
NAME="handleTrackingImage" VALUE="image" Image used as the slider handle when pressed. Image file must be of type .GIF or .JPG.
NAME="channelImage" VALUE="image" Image used as the background over which the slider handle travels. Image dimensions MUST be exactly the same as the dimensions of the Custom Slider Widget. Image file must be of type .GIF.
NAME="initialCondition" VALUE="number"|"FromInitHref" Specifies handle position when the page is loaded. The position value becomes the argument given to the href function(s). If FromInitHref is selected, the function specified by the InitHref attribute is called. The returned value determines the handle position. [The range is 0 - 65535 (0x00 - 0xFFFF)]
NAME="initHref" VALUE="function" Specifies the function called when the page is loaded. Use this attribute whenever FromInitHref is used as the initialCondition. The value returned from this function call will be used as the initial condition of the Custom Slider handle. See Appendix B for all available functions.
NAME="waitForInit" VALUE="TRUE"|"FALSE" Only valid if FromInitHref is used as the initialCondition. Specifies if the Custom Slider handle will wait for valid data before being displayed on the channel. If TRUE, the Custom Slider handle will not display until the data from the initHref function is received. If FALSE, or the attribute is not present, the Custom Slider handle momentarily starts at the minAt location until the initHref function receives its data.
NAME="handleOffset" VALUE="number" Specifies the number of pixels from the center of the channel the handle is located. If a vertical slider, positive numbers shift the handle to the right and negative numbers shift it to the left. If a horizontal slider, positive numbers shift the handle to the bottom and negative numbers shift it to the top. [The range is -100 through 100]
NAME="invisible" VALUE="TRUE"|"FALSE" Specifies if the Custom Slider is to start out invisible or not. If the attribute is not present, then by default the Custom Slider is visible. If the Custom Slider starts out invisible, the only way to make it visible again is via the IWC method "reappear()".
NAME="orientation" VALUE="HORIZONTAL"|"VERTICAL" Specifies if the handle is to travel horizontally or vertically. The orientation parameter will override the orientation determined by the height and width dimensions entered in the APPLET CODE Attribute Field.
Use the CustomSlider.class applet to create a Custom Slider Widget. For example, to create a horizontal slider that is 120 pixels wide and 20 pixels tall which uses handle.gif and handleTr.gif for the handle images and channel.gif for the channel image, sends a minimum value of 0x00 and a maximum value of 0x55 from right to left, initially starts based on the value of Internal RAM byte variable 7, and sets Internal RAM byte variable 7, use the following:
<APPLET CODE="CustomSlider.class" WIDTH="120" HEIGHT="20" NAME="CustomSlider1">
<PARAM NAME="href" VALUE="Amulet:InternalRAM.byte(7).setValue()">
<PARAM NAME="min" VALUE="0x00">
<PARAM NAME="max" VALUE="0x55">
<PARAM NAME="minAt" VALUE="right">
<PARAM NAME="handleImage" VALUE="handle.gif">
<PARAM NAME="handleTrackingImage" VALUE="handleTr.gif">
<PARAM NAME="channelImage" VALUE="channel.gif">
<PARAM NAME="initialCondition" VALUE="fromInitHref">
<PARAM NAME="initHref" VALUE="Amulet:InternalRAM.byte(7).value()">
<PARAM NAME="waitForInit" VALUE="true">
</APPLET>
See the \projects\Examples\CustomSlider\ directory for an HTML file showing an example custom slider widget.
The Dynamic Image Widget allows for the uploading of images, serially, at runtime. The size of the image to be uploaded must be the exact same size as the canvas image. Images are uploaded via xmodem crc protocol. The image must be in the Amulet bitmap format. The first 11-bytes of any image being uploaded, known as the header bytes, must be the same as the header bytes of the canvas image. The first six bytes are the flash header bytes and the next five bytes are the image header bytes. These first 11 bytes can be found in the link map file, which will be generated after saving or programming your project.
To correctly use the Dynamic Image Widget, the IWC method, Amulet:loadFlash(return), needs to be used. Once that method is invoked, the Amulet will start sending 'C's, ready to receive the incoming xmodem data from an external source. Once the image is fully sent, and the xmodem protocol is complete, meaning the external source sent an EOT(0x04) and the Amulet answered back with an ACK(0x06), the external source needs to send an ETB(0x17), which will take the Amulet out of the xmodem mode and return to the active page. The Dynamic Image Widget must then be sent a reset IWC method. The easiest way to accomplish this all is via a META REFRESH using a trigger. The META would look something like:
<META HTTP-EQUIV="REFRESH" CONTENT="0,0.25;ONVAR=Amulet:UART.byte(5).value();TRIGGER=0xFF;URL=Amulet:loadFlash(reset),Amulet:document.Dyn1.reset()">
In the above case, when the external processor is ready to send over a new image, it would respond back to the Amulet:UART.byte(5).value() request with a value of 0xFF, which would cause the Amulet to enter the loadFlash routine, which means C's will start coming from the Amulet. After the image has been uploaded to the Amulet and the external processor sends the ETB(0x17), the Amulet returns to the active page and then performs a reset condition to the Dynamic Image Widget called Dyn1, which forces a repaint using the new image which was just uploaded.
NAME="canvas" VALUE="image" Specifies the image used for the canvas of the Dynamic Image Widget. This is a required parameter. The canvas can contain a default image or it can be a completely blank image, but the dimensions of the canvas MUST be exactly the same as the dimensions of the Dynamic Image Widget. Image file must be of type .GIF.
Use the DynamicImage.class applet to create a Dynamic Image Widget. For example, to create a dynamic image widget that is 75 pixels wide and 75 pixels tall and has the image canvas.gif as a space holder, use the following:
<APPLET CODE="DynamicImage.class" WIDTH="75" HEIGHT="75" NAME="Dyn1">
<PARAM NAME="canvas" VALUE="canvas.gif">
</APPLET>
See the \projects\Examples\DynamicImage\ directory for an HTML file showing an example Dynamic Image widget.
Function buttons are Amulet anchors that provide either a "spring-loaded" or a "toggle" button image, depending upon the button type. By default, function button images appear to depress when touched. You can also setup the button image to invert when touched. By default, when hit, a button invokes a function (or set of functions). Optionally, function buttons can be set to auto-repeat while pressed. Initial delay and repeat frequency can both be customized.
Each button can have a user-defined label (text or numeric) within the button image. If the label is specified as "fromInitHref", the label will be based upon a string variable that is passed across the serial link at run-time. The label text will automatically wrap if the string exceeds the width of the function button. User-defined wraps can be specified by entering "\n" at the point of the desired wrap.
Function buttons can also be set up to auto-repeat. When pressed, an auto-repeat button delays a user-defined amount of time then invokes a function (or set of functions) at a user-defined frequency while the button is still being pressed. As a side benefit of the auto-repeat functionality, a button can be created that will appear to invoke its function(s) immediately upon being pressed instead of waiting until the button is released. By setting the delay very small and the frequency at 0, the button will invoke its function(s) after the very short delay time and not repeat again.
NOTE: To display a literal \ symbol in the label, use a double backslash in the string (e.g. 25 \\ 5 would display 25 \ 5 in the button).
NAME="href" VALUE="function(s)" The function (or multiple/sequenced functions) invoked when the button is hit.. See Appendix B for all available functions for the Function Button widget.
NAME="font" VALUE="font" Specifies the font used for the button label. The corresponding .amf file must be included in the Amulet/Configuration/Fonts folder. See AmuletFontConverter for more information regarding the creation of .amf files. Default is Amulet Sans Serif.
NAME="fontSize" VALUE="1"|"2"|"3"|"4"|"5"|"6"|"7" Specifies the font size for the button label. The assigned values are:
- 1 = 8-point font
- 2 = 10-point font
- 3 = 12-point font
- 4 = 14-point font
- 5 = 18-point font
- 6 = 24-point font Note: font size 6 for Amulet Sans Serif not supported.
- 7 = 36-point font Note: font size 7 for Amulet Sans Serif not supported.
NAME="fontStyle" VALUE="PLAIN"|"BOLD"|"ITALIC"|"UNDERLINE"|"STRIKE" Specifies the style associated with the button label font. To create a custom look, styles can be combined by using the "logical or" (|). However, PLAIN overrides any other style, and UNDERLINE and STRIKE cannot be used together. The available font styles are:
- PLAIN The option text uses the standard font.
- BOLD The option text is bold. (i.e. text)
- ITALIC The option text is italicized. (i.e. text)
- UNDERLINE The option text is underlined. (i.e. text)
- STRIKE The option text is stricken through. (i.e.
text)NAME="label" VALUE="text"|"FromInitHref" Specifies the text that appears inside the button. The button will NOT automatically re-size to fit the text. If there is enough vertical room, text will automatically wrap. Any text that will not fit within the confines of the button will be truncated. User-defined wraps can be specified by entering "\n" within the text at the spot you would like the wrap to occur. There is a maximum of 5 lines for a button label. The name field can be left blank; blank is the default.
To have the label be dynamically entered at runtime by the server, enter FromInitHref. By default, the dynamic button label can be a maximum of 25 characters in length. To increase the maximum number of characters, put the desired number in parentheses after FromInitHref. For example, to have a dynamic label up to 50 characters long, use FromInitHref(50). The attribute initHref needs to be of the type Amulet:UART.label(x).value(). It will be called only once upon the loading of the page, with the string returned from the server becoming the button label. See note regarding the use of InternalRAM label variables as button labels.
NAME="buttonType" VALUE="TOGGLE"|"SPRING-LOADED" Specifies the action of the button when hit. TOGGLE causes the button to depress (or invert) on a pen down event and stay depressed on the ensuing pen up event. SPRING-LOADED causes the button to depress on a pen down event and return to its original state on the following pen up event. SPRING-LOADED is the default.
NAME="onButtonPress" VALUE="DEPRESS"|"INVERT" Specifies the look of the button during a pen down condition. DEPRESS gives the illusion of the button being pressed. INVERT inverts the image inside the button. Depress is the default.
NAME="dualAction" VALUE="TRUE"|"FALSE" Specifies if the Function Button is to launch the href function(s) twice, once upon pressing the button and once upon releasing the button. If the attribute is not present, then by default the Function Button only launches its href function(s) upon release.
NAME="repeatDelay" VALUE="number" Time to delay from when button is initially pressed until it starts to auto-repeat. Specified in seconds, with a single floating-point number. The range is 0.01 - 655.35.
NAME="repeatRate" VALUE="number" The href function call frequency while button is being pressed, after the initial delay determined by repeatDelay. Specified in seconds, with a single floating-point number. The range is 0.00 - 655.35. 0.00 means do not repeat.
NAME="verticalAlign" VALUE="TOP"|"MIDDLE"|"BOTTOM" Specifies the vertical alignment of the string associated with the label attribute within the Function Button dimensions. Only one value is allowed; you cannot mix vertical alignments. Default is MIDDLE.
NAME="horizontalAlign" VALUE="LEFT"|"CENTER"|"RIGHT" Specifies the horizontal alignment of the string associated with the label attribute within the Function Button dimensions. Only one value is allowed; you cannot mix horizontal alignments. Default is CENTER.
NAME="invisible" VALUE="TRUE"|"FALSE" Specifies if the Function Button is to start out invisible or not. If the attribute is not present, then by default the Function Button is visible. If the Function Button starts out invisible, the only way to make it visible again is via the IWC method "reappear()".
NAME="initHref" VALUE="function" Specifies the function called when the page is loaded. Use this attribute only when FromInitHref is used as the label. The string value returned from the function call will be used as the button label. Only available function is of type Amulet:UART.label(x).value(). See note regarding the use of InternalRAM label variables as button labels.
Use the FunctionButton.class applet to create a Function Button. For example, to create a "DONE" button that is 60 pixels wide and 20 pixels tall, appears momentarily pressed when hit and links to home.htm, use the following:
<APPLET CODE="FunctionButton.class" WIDTH="60" HEIGHT="20" NAME="Button1">
<PARAM NAME="href" VALUE="home.htm">
<PARAM NAME="fontSize" VALUE="3">
<PARAM NAME="fontStyle" VALUE="BOLD">
<PARAM NAME="label" VALUE="DONE">
<PARAM NAME="buttonType" VALUE="SPRING-LOADED">
<PARAM NAME="onButtonPress" VALUE="DEPRESS">
</APPLET>
To create a "BUZZER" button that is 80 pixels wide and 24 pixels tall, appears momentarily inverted when hit, delays for 1 second while pressed before starting to auto-repeat, auto-repeats every 650 ms, and launches RPC # 12, use the following:
<APPLET CODE="FunctionButton.class" WIDTH="80" HEIGHT="24" NAME="Button2">
<PARAM NAME="href" VALUE="Amulet:UART.invokeRPC(12)">
<PARAM NAME="fontSize" VALUE="2">
<PARAM NAME="fontStyle" VALUE="ITALIC">
<PARAM NAME="label" VALUE="BUZZER">
<PARAM NAME="buttonType" VALUE="SPRING-LOADED">
<PARAM NAME="onButtonPress" VALUE="INVERT">
<PARAM NAME="repeatDelay" VALUE="1.00">
<PARAM NAME="repeatRate" VALUE="0.65">
</APPLET>
To create a dynamically labeled button that is 58 pixels wide and 22 pixels tall, appears momentarily pressed when hit, uses external string variable 1 as its label and sets external byte variable 7 to 0xFF, use the following:
<APPLET CODE="FunctionButton.class" WIDTH="58" HEIGHT="22" NAME="Button3">
<PARAM NAME="href" VALUE="Amulet:UART.byte(7).setValue(0xFF)">
<PARAM NAME="fontSize" VALUE="4">
<PARAM NAME="fontStyle" VALUE="BOLD">
<PARAM NAME="label" VALUE="FromInitHref">
<PARAM NAME="buttonType" VALUE="SPRING-LOADED">
<PARAM NAME="onButtonPress" VALUE="DEPRESS">
<PARAM NAME="initHref" VALUE="Amulet:UART.label(1).value()>"
</APPLET>
See the \projects\Examples\FunctionButton\ directory for an HTML file showing an example function button widget.
The Image Bar Widget uses two images (empty bar and full bar) to create a custom "bargraph". A byte (or word) returned from a function call is the widget input. Based upon the value of the byte (or word) returned, a percentage of the empty bar and a percentage of the full bar are displayed. For further customization, the wipe between empty and full can be from left-to-right, right-to-left, bottom-to-top, or top-to-bottom. When the minimum value is returned, the entire "empty" image is displayed. When the maximum value is returned, the entire "full" image is displayed.
NAME="href" VALUE="function" The function called to retrieve the widget input. See Appendix B for all available functions for the Image Bar widget. The function is called at an update rate specified by the updateRate attribute.
NAME="min" VALUE="number" Minimum value returned from the href function; must be less than max. If the function returns a byte, the range is 0 - 254 (0x00 - 0xFE). If the function returns a word, the range is 0 - 65534 (0x00 - 0xFFFE).
NAME="max" VALUE="number" Maximum value returned from the href function; must be greater than min. If the function returns a byte, the range is 1 - 255 (0x01 - 0xFF). If the function returns a word, the range is 1 - 65535 (0x01 - 0xFFFF).
NAME="empty" VALUE="image" Image used when minimum value is returned from the href function. Image file must be of type .GIF or .JPG.
NAME="full" VALUE="image" Image used when maximum value is returned from the href function. Image file must be of type .GIF or .JPG.
NAME="sweepFrom" VALUE="LEFT"|"RIGHT"|"TOP"|"BOTTOM" Determines where (within the image bar cell) to begin the image transition. The options are:
- LEFT The "full" and "empty" images transition from left-to-right.
- RIGHT The "full" and "empty" images transition from right-to-left.
- TOP The "full" and "empty" images transition from top-to-bottom.
- BOTTOM The "full" and "empty" images transition from bottom-to-top.
NAME="updateRate" VALUE ="1st number, 2nd number" The first number specifies the href function call frequency (specified in seconds, with a single floating-point number). The range is 0.00 - 655.35. A value of 0.00 means update never. The second number specifies the delay time from when the page is loaded until the first href function call (specified in seconds, with a single floating-point number). The range is 0.00 - 655.35. If the second number is not specified, then the delay time defaults to the first number (frequency).
NAME="invisible" VALUE="TRUE"|"FALSE" Specifies if the Image Bar is to start out invisible or not. If the attribute is not present, then by default the Image Bar is visible. If the Image Bar starts out invisible, the only way to make it visible again is via the IWC method "reappear()".
Use the ImageBar.class applet to create an Image Bar. For example, to create a drinking glass Image Bar 80 pixels wide and 170 pixels tall with a bottom-to-top sweep, a 250ms update rate, a 50ms start delay, and that uses external byte variable 17 as its input (with a range of 0 - 255), use the following:
<APPLET CODE="ImageBar.class" WIDTH="80" HEIGHT="170" NAME="ImageBar1">
<PARAM NAME="href" VALUE="Amulet:UART.byte(17).value()">
<PARAM NAME="min" VALUE="0">
<PARAM NAME="max" VALUE="255">
<PARAM NAME="empty" VALUE="glassE.gif">
<PARAM NAME="full" VALUE="glassF.gif">
<PARAM NAME="sweepFrom" VALUE="bottom">
<PARAM NAME="updateRate" VALUE=".25,.05">
</APPLET>
See the \projects\Examples\ImageBar\ directory for an HTML file showing an example image bar widget.
The Image Sequence Widget is similar to an animated bitmap. However, instead of being linked to a timer event, the transition between images is linked to a byte (or word) returned from an href function call. The displayed image is determined by scaling the value returned from the href function call. The following algorithm is used:
| Image # = | (total # of images) * (value of byte from function - min) |
|
|
|
|
(max - min + 1) |
The resultant number, truncated to an integer, is the number of the image to display, where the first image in the sequence is numbered 0. For all images to be displayable, (max-min+1) must be greater than or equal to the number of images. Also, if the href function returns a value less than the specified min, the value will be treated as equal to the specified min. Likewise, if the href function returns a value greater than the specified max, the value will be treated as equal to the specified max.
Consider the following example.
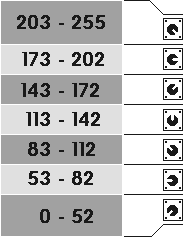
Although the value returned by the href function may vary with time, only one of the seven images will be displayed at any one time. Table 1, below, maps each value range to the image that will be displayed. Note that values below 23 are treated like a 23, and values above 232 are treated like a 232.
|
|
|
| 7*(203-23)/((232-23)+1) = 6 | |
| 7*(173-23)/((232-23)+1) = 5 | |
| 7*(143-23)/((232-23)+1) = 4 | |
| 7*(113-23)/((232-23)+1) = 3 | |
| 7*(83-23)/((232-23)+1) = 2 | |
| 7*(53-23)/((232-23)+1) = 1 | |
| 7*(23-23)/((232-23)+1) = 0 | |
Image Sequence Parameter Attributes:
NAME="href" VALUE="function" The function called to retrieve the widget input. See Appendix B for all available functions for the Image Sequence widget. The function is called at an update rate specified by the updateRate attribute.
NAME="min" VALUE="number" Minimum value returned from the href function; must be less than max. If the function returns a byte, the range is 0 - 254 (0x00 - 0xFE). If the function returns a word, the range is 0 - 65534 (0x00 - 0xFFFE).
NAME="max" VALUE="number" Maximum value returned from the href function; must be greater than min. If the function returns a byte, the range is 1 - 255 (0x01 - 0xFF). If the function returns a word, the range is 1 - 65535 (0x01 - 0xFFFF).
NAME="sequence" VALUE="image1;image2;image3(etc.)" List of images used, separated by semicolons. (Images can be either .GIF or .JPEG.) The range is 1 - 255 images.
NAME="waitForInit" VALUE="TRUE"|"FALSE" Specifies if the Image Sequence will wait for valid data before any image will be displayed on the LCD. If TRUE, the Image Sequence will not display any image until the first packet of data is received. If FALSE, or the attribute is not present, the Image Sequence starts out displaying the first image until the first packet of data is received.
NAME="updateRate" VALUE ="1st number, 2nd number" The first number specifies the href function call frequency (specified in seconds, with a single floating-point number). The range is 0.00 - 655.35. A value of 0.00 means update never. The second number specifies the delay time from when the page is loaded until the first href function call (specified in seconds, with a single floating-point number). The range is 0.01 - 655.35. If the second number is not specified, then the delay time defaults to the first number (frequency).
NAME="invisible" VALUE="TRUE"|"FALSE" Specifies if the Image Sequence is to start out invisible or not. If the attribute is not present, then by default the Image Sequence is visible. If the Image Sequence starts out invisible, the only way to make it visible again is via the IWC method "reappear()".
Use the ImageSeq.class applet to create an image sequence. For example, to create a sequence of 6 separate images (seq0.gif, seq1.gif, seq2.gif, seq3.gif, seq4.gif, seq5.gif) linked to external variable 17 (Min value 0, max value 5) with an update rate of 220ms, use the following:
<APPLET CODE="ImageSeq.class" WIDTH="200" HEIGHT="110" NAME="ImageSeq1">
<PARAM NAME="href" VALUE="Amulet:UART.byte(17).value()">
<PARAM NAME="min" VALUE="0">
<PARAM NAME="max" VALUE="5">
<PARAM NAME="sequence" VALUE="seq0.gif;seq1.gif;seq2.gif;seq3.gif;seq4.gif;seq5.gif>
<PARAM NAME="updateRate" VALUE=".22,0.01">
</APPLET>
See the \projects\Examples\ImageSequence\ directory for an HTML file showing an example image sequence widget.
The Line Graph Widget is a static line graph that represents an array of bytes (or words) returned from an href function call. Each byte (or word) in the array represents a point on the line graph. The line graph can be drawn over a background image. The graph is scaled in the y-direction based on yMin and yMax. There is a slight, yet noticeble, flicker every time the line graph is updated. Because of this, it is recommended that you update only when there is a change in data. The IWC method, forceUpdate(), can be used to force an update at asynchronous intervals. To see an example of the forceUpdate() method, see the LineGraph example.
Multiple line graphs can be handled by a single line graph widget. Each line graph shares the same yMin, yMax, xSamples and updateRate, but each graph needs its own href, lineWeight and linePattern values. The line graph that uses the first function specified in href has the line weight specified by the first number in lineWeight and the pattern specified by the first number in linePattern. The array specified in the second href function must be adjacent to the array specified in the first href function. For example, if displaying two line graphs, with an xSample of 10, the href functions would have to look something like this: Amulet:InternalRAM.bytes(0).value(),Amulet:InternalRAM.bytes(10).value().
NAME="href" VALUE="function" The function called to retrieve the widget input. See Appendix B for all available functions for the Line Graph Widget. The function is called at an update rate specified by the updateRate attribute. If dealing with multiple graphs, functions are comma delimited.
NAME="yMin" VALUE="number" Minimum value returned from the href function; must be less than yMax. If the function returns a byte, the range is 0 - 254 (0x00 - 0xFE). If the function returns a word, the range is 0 - 65534 (0x00 - 0xFFFE).
NAME="yMax" VALUE="number" Maximum value returned from the href function; must be greater than yMin. If the function returns a byte, the range is 1 - 255 (0x01 - 0xFF). If the function returns a word, the range is 1 - 65535 (0x01 - 0xFFFF).
NAME="xSamples" VALUE="number" Number of samples along the horizontal x-axis. The range is 2 - 125 (for a UART byte array), 2 - 62 (for a UART word array), 2 - 256 (for an InternalRAM byte array) and 2 - 256 (for an InternalRAM word array). NOTE: The value must be less than the value specified in the WIDTH attribute of the <APPLET> tag. TIP: In order for the graph to reach the far right of the dimensions of the Line Graph, refer to the following algorithm: # of pixels between plot points = (WIDTH of <APPLET> - 1) / (xSamples-1). For example, if you want to completely fill the graph of a 101 pixel wide line graph, then you should have a number that is one greater than a perfect divisor of 100 as your xSamples. So, your xSamples could be 3, 5, 6, 11, 21, 26, 41, 51. If 6 is chosen, the # of pixels between plot points is (201-1)/(6-1) = 40 pixels.
NAME="lineWeight" VALUE="pixels" Defines the weight (thickness) of the active line graph in pixels. The range is 1- 7 (0x01 - 0x07). If dealing with multiple graphs, weights are comma delimited.
NAME="linePattern" VALUE="number" Defines the pattern of the active line graph. Four different fill patterns are available (0 through 1), Figure 2. If no fill pattern is specified, the default is pattern 0. If dealing with multiple graphs, patterns are comma delimited.
|
|
|
Figure 2. LineGraph widget line patterns (values 0 through 1).
NAME="backgroundImage" VALUE="image" Image used as the Line Graph background image. Image dimensions should be the same as the dimensions of the Line Graph Widget. Image file must be of type .GIF or .JPG. If no image specified, the default background will be blank.
NAME="updateRate" VALUE ="1st number, 2nd number" The first number specifies the href function call frequency (specified in seconds, with a single floating-point number). The range is 0.00 - 655.35. A value of 0.00 means update never. The second number specifies the delay time from when the page is loaded until the first href function call (specified in seconds, with a single floating-point number). The range is 0.01 - 655.35. If the second number is not specified, then the delay time defaults to the first number (frequency).
NAME="invisible" VALUE="TRUE"|"FALSE" Specifies if the Line Graph is to start out invisible or not. If the attribute is not present, then by default the Line Graph is visible. If the Line Graph starts out invisible, the only way to make it visible again is via the IWC method "reappear()".
NAME="noFrame" VALUE="TRUE"|"FALSE" Specifies if the Line Graph is to have an x and y axis frame. This attribute is only applicable when columnClear is true. By default the Line Graph does not have a frame. If columnClear is true, then the Line Graph defaults to having a frame. Setting noFrame to true will cause the Line Graph to not have a frame.
NAME="columnClear" VALUE="TRUE"|"FALSE" Specifies if the Line Graph is cleared a column at a time. If set to true, flicker may be minimized, but because of the incremental clearing, the backgroundImage cannot be used. Due to the lack of a background image, the x and y-axis' are drawn based on the width and height. If the attribute is not present, it defaults to false.
NAME="enableVertical" VALUE="TRUE"|"FALSE" Specifies if the Line Graph can have vertical lines or not. If set to true, then two data points are needed for every plot point. If a vertical line is not desired, then both points should be the same value. Basically, every x coordinate gets two y-coordinates. So, if xSamples is set to 10, you will need to furnish the Line Graph with 20 data points. If this attribute is not present, it defaults to false.
Use the LineGraph.class applet to create a line graph. For example, to create a line graph 150 pixels wide by 150 pixels tall that graphs a 3-pixel weight black line linked to an InternalRAM byte array starting at variable 0, with a range of 0-255, and takes 30 X-axis samples, with a 300ms update rate, use the following:
<APPLET CODE="LineGraph.class" WIDTH="150" HEIGHT="150" NAME="LineGraph1">
<PARAM NAME="href" VALUE="Amulet:InternalRAM.bytes(0).value()">
<PARAM NAME="yMin" VALUE="0">
<PARAM NAME="yMax" VALUE="255">
<PARAM NAME="xSamples" VALUE="30">
<PARAM NAME="lineWeight" VALUE="3">
<PARAM NAME="linePattern" VALUE="0">
<PARAM NAME="backgroundImage" VALUE="backImg.gif">
<PARAM NAME="updateRate" VALUE=".3,0.01">
</APPLET>
To create a Line Graph 150 pixels wide by 150 pixels tall that graphs a 1-pixel weight black line linked to an external byte array starting at variable 0 and a 5-pixel weight gray line linked to an external byte array starting at variable 20, with a range of 0-255, and takes 20 X-axis samples, with a 2 second update rate, use the following:
<APPLET CODE="LineGraph.class" WIDTH="150" HEIGHT="150" NAME="LineGraph2">
<PARAM NAME="href" VALUE="Amulet:UART.bytes(0).value(),Amulet:UART.bytes(20).value()">
<PARAM NAME="yMin" VALUE="0">
<PARAM NAME="yMax" VALUE="255">
<PARAM NAME="xSamples" VALUE="20">
<PARAM NAME="lineWeight" VALUE="1,5">
<PARAM NAME="linePattern" VALUE="0,1">
<PARAM NAME="backgroundImage" VALUE="backImg.gif">
<PARAM NAME="updateRate" VALUE="2,0.01">
</APPLET>
See the \projects\Examples\LineGraph\ directory for an HTML file showing an example line graph widget.
The Line Plot Widget is a live line plot that represents a byte (or word) returned from an href function call. The x and y-axis' are drawn based on the width and height. The line plots from left-to-right, continuously wrapping and does not get erased upon the wrap. The plot is updated at each new x-sample and the current location is kept via a vertical cursor that is the same height as the y-axis. The plot is scaled in the y-direction based on yMin and yMax.
Multiple lineplots can be handled by a single line plot widget. Each line plot shares the same yMin, yMax, xSamples and updateRate, but each plot needs its own href, lineWeight and linePattern values. The line plot that uses the first function specified in href has the line weight specified by the first number in lineWeight and the pattern specified by the first number in linePattern.
NAME="href" VALUE="function" The function called to retrieve the widget input. See Appendix B for all available functions for the Line Plot Widget. The function is called at an update rate specified by the updateRate attribute. If dealing with multiple plots, functions are comma delimited.
NAME="yMin" VALUE="number" Minimum value returned from the href function; must be less than yMax. If the function returns a byte, the range is 0 - 254 (0x00 - 0xFE). If the function returns a word, the range is 0 - 65534 (0x00 - 0xFFFE).
NAME="yMax" VALUE="number" Maximum value returned from the href function; must be greater than yMin. If the function returns a byte, the range is 1 - 255 (0x01 - 0xFF). If the function returns a word, the range is 1 - 65535 (0x01 - 0xFFFF).
NAME="xSamples" VALUE="number" Number of samples along the horizontal x-axis. The range is 2 - 638 (0x02 - 0x27E). NOTE: The value must be less than the value specified in the WIDTH attribute of the <APPLET> tag.
NAME="lineWeight" VALUE="pixels" Defines the weight (thickness) of the active line plot in pixels. The range is 1- 7 (0x01 - 0x07). If dealing with multiple plots, weights are comma delimited.
NAME="linePattern" VALUE="number" Defines the pattern of the active line plot. Four different fill patterns are available (0 through 1), Figure 2. If no fill pattern is specified, the default is pattern 0. If dealing with multiple plots, patterns are comma delimited.
|
|
|
Figure 2. LinePlot widget line patterns (values 0 through 1).
NAME="updateRate" VALUE ="1st number, 2nd number" The first number specifies the href function call frequency (specified in seconds, with a single floating-point number). The range is 0.00 - 655.35. A value of 0.00 means update never. The second number specifies the delay time from when the page is loaded until the first href function call (specified in seconds, with a single floating-point number). The range is 0.01 - 655.35. If the second number is not specified, then the delay time defaults to the first number (frequency).
NAME="invisible" VALUE="TRUE"|"FALSE" Specifies if the Line Plot is to start out invisible or not. If the attribute is not present, then by default the Line Plot is visible. If the Line Plot starts out invisible, the only way to make it visible again is via the IWC method "reappear()".
NAME="noFrame" VALUE="TRUE"|"FALSE" Specifies if the Line Plot is to have an x and y axis frame. If the attribute is not present, then by default the Line Plot has a frame.
Use the LinePlot.class applet to create a line plot. For example, to create a line plot cell 150 pixels wide by 150 pixels tall that plots a 3-pixel weight black line linked to external byte variable 4, with a range of 0-255, and takes 30 X-axis samples, with a 50ms update rate, use the following:
<APPLET CODE="LinePlot.class" WIDTH="150" HEIGHT="150" NAME="LinePlot1">
<PARAM NAME="href" VALUE="Amulet:UART.byte(4).value()">
<PARAM NAME="yMin" VALUE="0">
<PARAM NAME="yMax" VALUE="255">
<PARAM NAME="xSamples" VALUE="30">
<PARAM NAME="lineWeight" VALUE="3">
<PARAM NAME="linePattern" VALUE="0">
<PARAM NAME="updateRate" VALUE=".05">
</APPLET>
To create a line plot cell 150 pixels wide by 150 pixels tall that plots a 1-pixel weight black line linked to external byte variable 2 and a 5-pixel weight gray line linked to external byte variable 4, with a range of 0-255, and takes 20 X-axis samples, with a 70ms update rate, use the following:
<APPLET CODE="LinePlot.class" WIDTH="150" HEIGHT="150" NAME="LinePlot2">
<PARAM NAME="href" VALUE="Amulet:UART.byte(2).value(),Amulet:UART.byte(4).value()">
<PARAM NAME="yMin" VALUE="0">
<PARAM NAME="yMax" VALUE="255">
<PARAM NAME="xSamples" VALUE="20">
<PARAM NAME="lineWeight" VALUE="1,5">
<PARAM NAME="linePattern" VALUE="0,1">
<PARAM NAME="updateRate" VALUE=".07">
</APPLET>
See the \projects\Examples\LinePlot\ directory for an HTML file showing an example line plot widget.
The Linear Gauge Widget uses two images (a background image and a pointer image) to create a custom "linear gauge". The pointer travels linearly on the background image and is positioned based upon the value of the byte (or word) returned from an href function call. The height and width dimensions entered in the APPLET CODE Attribute Field determine whether the pointer travels horizontal or vertical. By default, the longer dimension establishes the path that the pointer travels. Optionally, the orientation can be specified if it is desired to have the pointer travel the shorter dimension.
NAME="href" VALUE="function" The function called to retrieve the widget input. See Appendix B for all available functions for the Linear Gauge widget. The function is called at an update rate specified by the updateRate attribute.
NAME="min" VALUE="number" Minimum value returned from the href function; must be less than max. If the function returns a byte, the range is 0 - 254 (0x00 - 0xFE). If the function returns a word, the range is 0 - 65534 (0x00 - 0xFFFE).
NAME="max" VALUE="number" Maximum value returned from the href function; must be greater than min. If the function returns a byte, the range is 1 - 255 (0x01 - 0xFF). If the function returns a word, the range is 1 - 65535 (0x01 - 0xFFFF).
NAME="minAt" VALUE=""LEFT"|"RIGHT"|"TOP"|"BOTTOM"" Determines where the minimum value of the linear gauge is located. When the minimum value is returned, the pointer is located at the minAt location. As the value increases, the pointer travels the length of the linear background image until the maximum value is reached and the pointer is then located at the opposite extreme of the minAt location. Default values are LEFT for horizontal linear gauges and BOTTOM for vertical linear gauges. The options are:
- LEFT The pointer value increases from left to right. (horizontal linear gauge only)
- RIGHT The pointer value increases from right to left. (horizontal linear gauge only)
- TOP The pointer value increases from top to bottom. (vertical linear gauge only)
- BOTTOM The pointer value increases from bottom to top. (vertical linear gauge only)
NAME="pointerImage" VALUE="image" Image used as the pointer which travels across the linear background image. Image file must be of type .GIF or .JPG.
NAME="backgroundImage" VALUE="image" Image used as the linear background image. Image dimensions must be exactly the same as the dimensions of the Linear Gauge Widget. Image file must be of type .GIF.
NAME="waitForInit" VALUE="TRUE"|"FALSE" Specifies if the Linear Gauge pointer will wait for valid data before being displayed on the linearImage. If TRUE, the Linear Gauge pointer will not display until valid data is received. If FALSE, or the attribute is not present, the Linear Gauge pointer starts at the minAt location until the first packet of data is received.
NAME="updateRate" VALUE ="1st number, 2nd number" The first number specifies the href function call frequency (specified in seconds, with a single floating-point number). The range is 0.00 - 655.35. A value of 0.00 means update never. The second number specifies the delay time from when the page is loaded until the first href function call (specified in seconds, with a single floating-point number). The range is 0.01 - 655.35. If the second number is not specified, then the delay time defaults to the first number (frequency).
NAME="pointerOffset" VALUE="number" Specifies the number of pixels from the center of the channel the handle is located. If a vertical slider, positive numbers shift the handle to the right and negative numbers shift it to the left. If a horizontal slider, positive numbers shift the handle to the bottom and negative numbers shift it to the top. [The range is -100 through 100]
NAME="invisible" VALUE="TRUE"|"FALSE" Specifies if the Linear Gauge is to start out invisible or not. If the attribute is not present, then by default the Linear Gauge is visible. If the Linear Gauge starts out invisible, the only way to make it visible again is via the IWC method "reappear()".
NAME="orientation" VALUE="HORIZONTAL"|"VERTICAL" Specifies if the pointer icon is to travel horizontally or vertically. The orientation parameter will override the orientation determined by the height and width dimensions entered in the APPLET CODE Attribute Field.
Use the LinearGauge.class applet to create a Linear Gauge. For example, to create a temperature gauge 80 pixels wide and 170 pixels tall with a bottom-to-top sweep, using a background image called background.gif and a pointer image called pointer.gif, a 250ms update rate, a 50ms start delay, and that uses external byte variable 15 as its input (with a range of 0 - 255), use the following:
<APPLET CODE="LinearGauge.class" WIDTH="80" HEIGHT="170" NAME="LinGauge1">
<PARAM NAME="href" VALUE="Amulet:UART.byte(15).value()">
<PARAM NAME="min" VALUE="0">
<PARAM NAME="max" VALUE="255">
<PARAM NAME="minAt" VALUE="bottom">
<PARAM NAME="backgroundImage" VALUE="background.gif">
<PARAM NAME="pointerImage" VALUE="pointer.gif">
<PARAM NAME="updateRate" VALUE=".25,.05">
</APPLET>
See the \projects\Examples\LinearGauge\
directory for an HTML file showing an example linear gauge widget.
Use the List Widget to create a list of selectable text objects that share a common function (or set of functions) and that are vertically aligned in a box. Selecting a list object highlights that object on the display and invokes the href function(s) with the value of the list item being the argument. The values associated with each list entry are specified similar to C's "enum" specifier, where the first object in the list will have a value of 00, the second item 01, etc, unless an explicit value is given. If not all values are specified, unspecified values continue the progression from the last specified value. By specifying an initial condition, that option is highlighted when the page is loaded, the href function(s) are invoked and the value associated with that list object is used as the argument.
Important note: The HEIGHT and WIDTH attributes for List.class DO NOT specify the actual size of the List Box drawn on the screen. Instead, these attributes specify the size of the cell that contains the list box, and the relative position of other objects on the screen. The µHTML code draws the box starting from the top-left corner of the cell. The code optimizes the width of the drawn box based on the width of the option titles and the specified font. The maximum number of visible list items that can fit in a box based on the HEIGHT attribute determines the actual height of the drawn box. Any remaining list items will be hidden from view, but are reachable via an arrow that allows for page scrolling through a list. You can also scroll through the list an item at a time by keeping the pen down and moving above or below the drawn list box.
NAME="href" VALUE="function(s)" The function (or multiple/sequenced functions) invoked when a list item is hit. See Appendix B for all available functions for the List widget.
NAME="font" VALUE="font" Specifies the font used for the option names within the list box. The corresponding .amf file must be included in the Amulet/Configuration/Fonts folder. See AmuletFontConverter for more information regarding the creation of .amf files. Default is Amulet Sans Serif.
NAME="fontSize" VALUE="1"|"2"|"3"|"4"|"5"|"6"|"7" Specifies the font size for the option names within the list box. Only one value is allowed per list box; you cannot mix font sizes. The assigned values are:
- 1 = 8-point font
- 2 = 10-point font
- 3 = 12-point font
- 4 = 14-point font
- 5 = 18-point font
- 6 = 24-point font Note: font size 6 for Amulet Sans Serif not supported.
- 7 = 36-point font Note: font size 7 for Amulet Sans Serif not supported.
NAME="fontStyle" VALUE="PLAIN"|"BOLD"|"ITALIC"|"UNDERLINE"|"STRIKE" Specifies the style associated with the list box font. To create a custom look, styles can be combined by using the "logical or" (|). However, PLAIN overrides any other style. The available font styles are:
- PLAIN The option text uses the standard font.
- BOLD The option text is bold. (i.e. text)
- ITALIC The option text is italicized. (i.e. text)
- UNDERLINE The option text is underlined. (i.e. text)
- STRIKE The option text is stricken through. (i.e.
text)NAME="options" VALUE="string1,string2,string3(etc.)" Specifies the list strings. All strings are comma delimited. Note: Any spaces before or after the commas are included in the text string. To specify an intrinsic value, append "= xxx" to the individual titles; (where xxx is a number from 0 - 65535 (0x00 - 0xFFFF) or a STRING. See note regarding Control Widget intrinsic values.) The first option displays at the top of the list and each subsequent option displays directly below the previous.
NAME="initialCondition" VALUE="string"|"FromInitHref" Specifies which option string is highlighted when the page is loaded. The value associated with the highlighted option string is the argument given to the href function(s). If "FromInitHref" is selected, the function specified by the InitHref attribute is called. Whichever option has the same intrinsic value as the returned value from the initHref function will be initially highlighted.
NAME="initHref" VALUE="function" Specifies the function called when the page is loaded. Use this attribute whenever FromInitHref is used as the initialCondition. The value returned from this function call will determine which option string starts out highlighted. The value should match the intrinsic value of one of the options strings. See Appendix B for all available functions.
NAME="upArrow" VALUE="image" Specifies the "page up arrow" image to use when the list has more items than can be viewed. If this attribute is not present, then a default image, upArrow.gif, located in Amulet/Configuration/Widgets/List/, is used. (Images can be either .GIF or .JPEG.)
NAME="downArrow" VALUE="image" Specifies the "page down arrow" image to use when the list has more items than can be viewed. If this attribute is not present, then a default image, downArrow.gif, located in Amulet/Configuration/Widgets/List/, is used. (Images can be either .GIF or .JPEG.)
NAME="delimiter" VALUE="char" Specifies the delimiter of strings in the options attributes. By default the delimiter is ",", but if it is desired to have a comma within the string, you can specify any single ASCII character as the string delimiter. Just make sure none of your strings is using the ASCII character.
NAME="equalSign" VALUE="char" Specifies the delimiter of string values in the options attributes. By default the delimiter is "=", but if it is desired to have an equal sign within the string, you can specify any single ASCII character as the string value delimiter. Just make sure none of your strings is using the ASCII character.
NAME="invisible" VALUE="TRUE"|"FALSE" Specifies if the List is to start out invisible or not. If the attribute is not present, then by default the List is visible. If the List starts out invisible, the only way to make it visible again is via the IWC method "reappear()".
Use the List.class applet to create a list of selectable items. For example, to create a list box with four list items that use plain, 12-point Amulet Sans Serif type, with Item 2 initially highlighted, sets external byte variable 2, and Item 1 has a value of 0x10, Item 2 = 0x20, Item 3 = 0x30 and Item 4 = 0x31, use the following:
<APPLET CODE="List.class" WIDTH="20" HEIGHT="110" NAME="List1">
<PARAM NAME="href" VALUE="Amulet:UART.byte(2).setValue()">
<PARAM NAME="fontSize" VALUE="3">
<PARAM NAME="fontStyle" VALUE="PLAIN">
<PARAM NAME="options" VALUE="Item 1=0x10,Item 2=0x20,Item 3=0x30,Item 4">
<PARAM NAME="initialCondition" VALUE="Item 2">
</APPLET>
To create a list box with four list items that use plain, 12-point Amulet Sans Serif type, with Str 2 initially highlighted, sets external string variable 3, and Str 1 has a value of "String 1", Str 2 = "String 2", Str 3 = "String 3" and Str 4 = "String 4", use the following:
<APPLET CODE="List.class" WIDTH="20" HEIGHT="110" NAME="List1">
<PARAM NAME="href" VALUE="Amulet:UART.string(3).setValue()">
<PARAM NAME="fontSize" VALUE="3">
<PARAM NAME="fontStyle" VALUE="PLAIN">
<PARAM NAME="options" VALUE='Str 1="String 1",Str 2="String 2",Str 3="String 3",Str 4="String 4"'>
<PARAM NAME="initialCondition" VALUE="Str 2">
</APPLET>
See the \projects\Examples\List\ directory for an HTML file showing an example list widget.
The Numeric Field Widget uses a byte (or word) returned from an href function call. The numeric field can display a mixture of static text and a live number. The string is input using the standard C printf format. The Numeric Field Widget can display in integer, hexadecimal, and floating-point formats. Like printf, the variable is entered using the % character. The first digit following the % specifies the number of character spaces allocated to the live numeric field (including a decimal point, and plus (+) or minus (-) symbols). You can also have static text preceding and following the live numeric field. For example, to create a numeric field that displays "Output = 2.25 Volts", the printf field would read: "Output = %5.2f Volts". In this example, "5" specifies the number of character spaces, ".2" specifies the number of digits to the right of the decimal, and "f" specifies floating-point numbers.
If the width of the numeric field widget is less than required, the string will be truncated. Make sure your dimensions are large enough to hold all your text and numbers.
NAME="href" VALUE="function" The function called to retrieve the widget input. See Appendix B for all available functions for the Numeric Field Widget. The function is called at an update rate specified by the updateRate attribute.
NAME="font" VALUE="font" Specifies the font used for the static text defined in printf. The corresponding .amf file must be included in the Amulet/Configuration/Fonts folder. See AmuletFontConverter for more information regarding the creation of .amf files. Default is Amulet Sans Serif.
NAME="fontSize" VALUE="1"|"2"|"3"|"4"|"5"|"6"|"7" Specifies the font size for the static text defined in printf. The assigned values are:
- 1 = 8-point font
- 2 = 10-point font
- 3 = 12-point font
- 4 = 14-point font
- 5 = 18-point font
- 6 = 24-point font Note: font size 6 for Amulet Sans Serif not supported.
- 7 = 36-point font Note: font size 7 for Amulet Sans Serif not supported.
NAME="fontStyle" VALUE="PLAIN"|"BOLD"|"ITALIC"|"UNDERLINE"|"STRIKE" Specifies the style associated with the font of the static text defined in printf. To create a custom look, styles can be combined by using the "logical or" (|). However, PLAIN overrides any other style. The available font styles are:
- PLAIN The option text uses the standard font.
- BOLD The option text is bold. (i.e. text)
- ITALIC The option text is italicized. (i.e. text)
- UNDERLINE The option text is underlined. (i.e. text)
- STRIKE The option text is stricken through. (i.e.
text)NAME="numFont" VALUE="font" Specifies the font used for the dynamic numeric field. This MUST be a fixed width font. The corresponding .amf file must be included in the Amulet/Configuration/Fonts folder. See AmuletFontConverter for more information regarding the creation of .amf files. Default is Amulet Sans Serif FW. Amulet Sans Serif FW .amf files are preloaded in the Amulet/Configuration/Fonts folder.
NAME="numFontSize" VALUE="1"|"2"|"3"|"4"|"5"|"6"|"7" Specifies the font size for the dynamic numeric field. The assigned values are:
- 1 = 8-point font
- 2 = 10-point font
- 3 = 12-point font
- 4 = 14-point font
- 5 = 18-point font
- 6 = 24-point font Note: font size 6 for Amulet Sans Serif not supported.
- 7 = 36-point font Note: font size 7 for Amulet Sans Serif not supported.
NAME="numFontStyle" VALUE="PLAIN"|"BOLD"|"ITALIC"|"UNDERLINE"|"STRIKE" Specifies the style associated with the dynamic numeric field font. To create a custom look, styles can be combined by using the "logical or" (|). However, PLAIN overrides any other style. The available font styles are:
- PLAIN The option text uses the standard font.
- BOLD The option text is bold. (i.e. text)
- ITALIC The option text is italicized. (i.e. text)
- UNDERLINE The option text is underlined. (i.e. text)
- STRIKE The option text is stricken through. (i.e.
text)NAME="verticalAlign" VALUE="TOP"|"MIDDLE"|"BOTTOM" Specifies the vertical alignment of the string associated with the printf attribute within the Numeric Field dimensions. Only one value is allowed; you cannot mix vertical alignments. Default is TOP.
NAME="horizontalAlign" VALUE="LEFT"|"CENTER"|"RIGHT" Specifies the horizontal alignment of the string associated with the printf attribute within the Numeric Field dimensions. Only one value is allowed; you cannot mix horizontal alignments. Default is LEFT.
NAME="colorInvert" VALUE="REGION"|"NONE" Specifies if the string is shown as reverse video or not. If REGION selected, the entire region (including the text) of the Numeric Field will be inverted. If NONE selected, Numeric Field will not be inverted. Only one value is allowed; you cannot mix color inversion properties. Default is NONE.
NAME="min" VALUE="number" Minimum value returned from the href function; must be less than max. If the function returns a byte, the range is 0 - 254 (0x00 - 0xFE). If the function returns a word, the range is 0 - 65534 (0x00 - 0xFFFE).
NAME="max" VALUE="number" Maximum value returned from the href function; must be greater than min. If the function returns a byte, the range is 1 - 255 (0x01 - 0xFF). If the function returns a word, the range is 1 - 65535 (0x01 - 0xFFFF).
NAME="printf" VALUE="text %format text" Specifies the text and the formatted numeric field to be displayed (similar to the standard C program printf command). The Numeric Field Widget can display integer, hexadecimal, and floating-point numbers.
To display integers, the format is %ai, where "a" is the number of character spaces, and "i" specifies integers. With floating-point numbers, the format is %a.bf, where "a" is the total number of character spaces, "b" is the number of digits to the right of the decimal point, and "f" specifies floating-point numbers. With hexadecimal numbers, the format is %aX or %ax, where "a" is the number of character spaces, and "X" specifies that the hexadecimal digits will be upper case (A-F), while "x" specifies lower case (a-f).
NOTE: To display a % symbol in the numeric field, use %% (e.g. Duty Cycle(%%)=%5.2f will display Duty Cycle(%)=99.99).
There are also flags that change the numeric field format. Format flags are entered between the % and the character space specification. The flags are: "-", "+", "0", "#" and " ". The flags are defined, as follows:
- "-" specifies that the numeric field is left-justified. (The default is right-justified.)
- "+" specifies that positive numbers are preceded with a plus sign.
- "0" specifies that a right-justified numeric field lead with zeroes. (The default is right-justified with leading spaces).
- "#" specifies that displayed hexadecimal numbers are preceded with 0x.
- " " a blank space specifies that a left-justified numeric field lead with a single space when displaying a positive number, and lead with a negative sign (-) when displaying a negative number.
NAME="minFld" VALUE="number" Specifies what the numeric field displays when the minimum value is returned from the href function call. When using hexadecimal, you must precede the minFld number with 0x. By default, the 0x will NOT be displayed unless the "#" flag is used in the printf field. The minFld value does NOT have to be less than the maxFld value. (Negative slope is permissible.) Range is -65535 to 65535 when using integers and floating point numbers, and 0 to 0xffff when using hex numbers. See note below regarding the span between minFld and maxFld.
| Formatting Value |
minFld Example |
maxFld Example |
|
|
||
| %3i %3i %3i |
-20 200 200 |
10 999 -40 |
| %5.2f %5.2f |
-2.00 0.00 |
0.00 25.00 |
| %6.2f | -50.00 | 50.00 |
| %#4x %2X |
0x00 0xFF |
0xff 0xAA |
Table 1. Numeric Field formatting examples using the right-justified default.
(The implied ranges are arbitrary.)
NAME="maxFld" VALUE="number" Specifies what the numeric field displays when the maximum value is returned from the href function call. When using hexadecimal, you must precede the minFld number with 0x. By default, the 0x will NOT be displayed unless the "#" flag is used in the printf field. The maxFld value does NOT have to be greater than the minFld value. Range is -65535 to 65535 when using integers and floating point numbers and 0 to 0xffff when using hex numbers. See note below regarding the span between minFld and maxFld.
Note regarding the span between minFld and maxFld: When using integers and floating point numbers, the value stored by the Amulet OS is a 16-bit number. When using a floating point number, the decimal point is removed and the digits to the right of the decimal point are concatenated with those to the left of the decimal point. So, 655.35 is stored as 65535 (the maximum 16-bit number). In addition, the span between minFld and maxFld is limited to a 16-bit number. For example if the min is -65535, then the largest max can be is 0 (which would result in a span of 65535). Therefore, even though -65535 is a valid min and 65535 is a valid max, the span is larger than a 16-bit number (causing an Amulet compiler error).
NAME="border" VALUE="number" Specifies width, in pixels, of the border around the dimensions of the numeric field. Default is 0, meaning no border.
NAME="waitForInit" VALUE="TRUE"|"FALSE" Specifies if the Numeric Field will wait for valid data before being displayed on the LCD. If TRUE, the Numeric Field will not display any dynamic numbers until the first packet of data is received. If FALSE, or the attribute is not present, the Numeric Field starts out displaying the minimum value until the first packet of data is received.
NAME="updateRate" VALUE ="1st number, 2nd number" The first number specifies the href function call frequency (specified in seconds, with a single floating-point number). The range is 0.00 - 655.35. A value of 0.00 means update never. The second number specifies the delay time from when the page is loaded until the first href function call (specified in seconds, with a single floating-point number). The range is 0.01 - 655.35. If the second number is not specified, then the delay time defaults to the first number (frequency).
NAME="invisible" VALUE="TRUE"|"FALSE" Specifies if the Numeric Field is to start out invisible or not. If the attribute is not present, then by default the Numeric Field is visible. If the Numeric Field starts out invisible, the only way to make it visible again is via the IWC method "reappear()".
Use the Field.class applet to create a numeric field. For example, to create a Numeric Field that uses the 14-point bold, italicized, Amulet Sans Serif font, and calls external byte variable 3 (with a range of 0-255) at an update rate of 330ms, use the following:
<APPLET CODE="Field.class" WIDTH="160" HEIGHT="25" NAME="Field1">
<PARAM NAME="href" VALUE="Amulet:UART.byte(3).value()">
<PARAM NAME="fontSize" VALUE="4">
<PARAM NAME="fontStyle" VALUE="BOLD|ITALIC">
<PARAM NAME="min" VALUE="0">
<PARAM NAME="max" VALUE="255">
<PARAM NAME="printf" VALUE="Output = %5.2f Volts">
<PARAM NAME="minFld" VALUE="-5.00">
<PARAM NAME="maxFld" VALUE="5.00">
<PARAM NAME="updateRate" VALUE=".33,0.01">
</APPLET>
See the \projects\Examples\Field\ directory for an HTML file showing an example field widget.
A Radio Button is a labeled, round button used to make a single selection from several options. To set a radio button, click on either the button or the adjacent label. All radio buttons that have the same groupName are considered part of a radio button group. Only one radio button within a group can be set at any one time. When a radio button is selected, its href function(s) are invoked.
When using initHref to determine the initialCondition of the radio button group, the value of the data returned from the initHref function must match the internalNumber of one of the radio buttons in the group. If the internalNumber is not specified, the first radio button found in the html file will be assigned internal number 1, with the internal numbers incrementing with each subsequent radio button found in the html which is part of the same radio button groupName.
NAME="href" VALUE="function(s)" The function (or multiple/sequenced functions) invoked when a radio button is set. Unlike checkboxes, radio buttons within a group can call different href function(s). See Appendix B for all available functions for the Radio Button widget.
NAME="font" VALUE="font" Specifies the font used for the radio button label. The corresponding .amf file must be included in the Amulet/Configuration/Fonts folder. See AmuletFontConverter for more information regarding the creation of .amf files. Default is Amulet Sans Serif.
NAME="fontSize" VALUE="1"|"2"|"3"|"4"|"5"|"6"|"7" Specifies the font size for the radio button label. The assigned values are:
- 1 = 8-point font
- 2 = 10-point font
- 3 = 12-point font
- 4 = 14-point font
- 5 = 18-point font
- 6 = 24-point font Note: font size 6 for Amulet Sans Serif not supported.
- 7 = 36-point font Note: font size 7 for Amulet Sans Serif not supported.
NAME="fontStyle" VALUE="PLAIN"|"BOLD"|"ITALIC"|"UNDERLINE"|"STRIKE" Specifies the style associated with the radio button label font. To create a custom look, styles can be combined by using the "logical or" (|). However, PLAIN overrides any other style. The available font styles are:
- PLAIN The option text uses the standard font.
- BOLD The option text is bold. (i.e. text)
- ITALIC The option text is italicized. (i.e. text)
- UNDERLINE The option text is underlined. (i.e. text)
- STRIKE The option text is stricken through. (i.e.
text)NAME="buttonAlign" VALUE="LEFT"|"RIGHT" Specifies the location of the radio button in relation to the label text.
NAME="label" VALUE="text" Specifies the name that appears to the right or left of the radio button.
NAME="groupName" VALUE="text" Specifies the radio button group this radio button is a part of.
NAME="initialCondition" VALUE="ON"|"OFF"|"FromInitHref" Specifies the initial condition of the radio button when the page is loaded. If "FromInitHref" is selected, the function specified by the InitHref attribute is called. The returned byte value determines which single button (if any) within the group is selected; the returned value must exactly match one of the button's internalNumber.
NAME="initHref" VALUE="function" Specifies the function called when the page is loaded. Use this attribute whenever FromInitHref is used as the initialCondition. All radio buttons within a group must have the same initHref function. The value of the data returned from the initHref function must match the internalNumber of one of the radio buttons in the group. If there is See Appendix B for all available functions.
NAME="hrefOnHitOnly" VALUE="TRUE"|"FALSE" Specifies if the radio button href function(s) is launched only upon a "hit" or not. By default, hrefOnHitOnly is false, which means if the radio button has an initHref function, the href of the radio button which starts out "on" is launched upon loading the page. The href is also launched after a forceUpdate() call. By setting hrefOnHitOnly to true, the href will only be launched upon the radio button physically being selected or upon a forceHit() call.
NAME="emptyImage" VALUE="image" Specifies the image to use when the radio button is in the not set state. If this attribute is not present, then a default image, emptyImage.gif, located in Amulet/Configuration/Widgets/RadioButton/, is used.
NAME="trackingImage" VALUE="image" Specifies the image to use when the radio button is in the pen down state. If this attribute is not present, then a default image, trackingImage.gif, located in Amulet/Configuration/Widgets/RadioButton/, is used.
NAME="fullImage" VALUE="image" Specifies the image to use when the radio button is in the set state. If this attribute is not present, then a default image, fullImage.gif, located in Amulet/Configuration/Widgets/RadioButton/, is used.
NAME="invisible" VALUE="TRUE"|"FALSE" Specifies if the Radio Button is to start out invisible or not. If the attribute is not present, then by default the radio button is visible. If the Radio Button starts out invisible, the only way to make it visible again is via the IWC method "reappear()".
NAME="internalNumber" VALUE="number" Specifies the internal number of the radio button, used by the OS to determine which radio button is on. Should only be used if using initHref. Each button within a radio button group must have a unique internal number. If the value of the data returned from the initHref function matches the internalNumber of the radio button, then that radio button starts out in the "on" position. If the internalNumber is not specified, the first radio button found in the html file will be assigned internal number 1, with the internal numbers incrementing with each subsequent radio button found in the html which is part of the same radio button group.
Use the RadioButton.class applet to create a Radio Button. For example, to create a radio button 150 pixels wide and 22 pixels tall that is positioned right of the label "Button 1", and sets external byte variable 5 to 0x51 when on, use the following:
<APPLET CODE="RadioButton.class" WIDTH="150" HEIGHT="22" NAME="RB1">
<PARAM NAME="href" VALUE="Amulet:UART.byte(5).setValue(0x51)">
<PARAM NAME="fontSize" VALUE="3">
<PARAM NAME="fontStyle" VALUE="PLAIN">
<PARAM NAME="label" VALUE="Button 1">
<PARAM NAME="buttonAlign" VALUE="right">
<PARAM NAME="groupName" VALUE="rbg1">
<PARAM NAME="initialCondition" VALUE="ON">
</APPLET>
See the \projects\Examples\BarGraph\ directory for an HTML file showing an example radio button widget.
The Scribble Widget allows for freehand drawing on a canvas. Assuming a stylus is being used, when the stylus sets down in the canvas of the Scribble Widget and starts moving within the canvas, a freehand line is drawn, following the directions of the stylus. The freehand line can be 1 to 15 pixels thick and can be one of 16 different patterns. The Scribble canvas can have an optional background image and border. An InterWidget Communications method, uploadImage(), allows for another widget/object to make the Scribble Widget transfer the raw image data to an external processor via an xmodem protocol. The raw image is in the Amulet bitmap format.
NAME="href" VALUE="function" The function invoked upon receiving the uploadImage() IWC method. Only valid function is currently Amulet:UART.xmodemUploadImage().
NAME="lineWeight" VALUE="pixels" Defines the weight (thickness) of the active freehand drawing line in pixels. The range is 1- 15 (0x01 - 0x0F).
NAME="linePattern" VALUE="number" Defines the pattern of the active freehand line. Sixteen different fill patterns are available (0 through 15), Figure 1. If no fill pattern is specified, the default is pattern 0.
NAME="border" VALUE="number" Specifies width, in pixels, of the border around the dimensions of the Scribble Widget. Default is 0, meaning no border.
NAME="canvas" VALUE="image" Specifies the image used for the canvas of the Scribble Widget. This is a required parameter. The canvas can contain a background image or it can be a completely blank image, but the dimensions of the canvas MUST be exactly the same as the dimensions of the Scribble Widget. Image file must be of type .GIF.
NAME="background" VALUE="image" Specifies the optional background image used for the canvas of the Scribble Widget. This is an optional parameter. The image does not have to be the exact same dimensions as the Scribble Widget, but it will start drawing the background image from the topleft corner of the Scribble Widget. Image file must be of type .GIF or .JPG.
Use the Scribble.class applet to create a Scribble Widget. For example, to create a scribble widget that is 280 pixels wide and 200 pixels tall that uses the background image, canvas.gif, and draws a 2-pixel wide black line and has a 1-pixel wide border, use the following:
<APPLET CODE="Scribble.class" WIDTH="280" HEIGHT="200" NAME="Scrib1">
<PARAM NAME="href" VALUE="Amulet:UART.xmodemUploadImage()">
<PARAM NAME="lineWeight" VALUE="2">
<PARAM NAME="linePattern" VALUE="0">
<PARAM NAME="border" VALUE="1">
<PARAM NAME="canvas" VALUE="canvas.gif">
</APPLET>
See the \projects\Examples\Scribble\ directory for an HTML file showing an example scribble widget.
The Slider Widget invokes a function (or set of functions) either upon 1) any movement of the handle (onChange) or 2) only when the handle has been released (onPenUp). The argument is determined by the location of the handle and the limits setup with the min and max attributes. The location of the min value is determined by the minAt attribute(left, right, top or bottom). The height and width dimensions entered in the APPLET CODE Attribute Field determine whether the slider is horizontal or vertical. The longer dimension establishes the path that the slider travels, while the shorter dimension determines the maximum handle size. In addition, the widget creates a 3-pixel wide "channel" along the slider path. To move the slider, touch the handle and drag it along the channel. If hrefEvent is setup as onChange, the slider invokes the function(s) whenever the handle moves. If hrefEvent is setup as onPenUp, the slider invokes the function(s) only upon releasing the handle. Touching anywhere on the channel causes the handle to snap to that location and invoke the function(s) with the corresponding argument. Tick marks are optional. As an option, you can specify the offset of the handle from the center of the channel by using the handleOffset parameter.
NAME="href" VALUE="function(s)" The function (or multiple/sequenced functions) invoked upon the event specified in hrefEvent. See Appendix B for all available functions for the Slider widget.
NAME="hrefEvent" VALUE="onChange"|"onPenUp" The event which triggers the launching of the href function. If set to onChange, the slider will launch the function call whenever the handle is moved. If set to onPenUp, the slider will only launch the function call upon the releasing of the slider handle. If hrefEvent is not specified, the default is onChange.
NAME="min" VALUE="number" The minimum value used as the argument given to the function(s) specified in href. Minimum value is achieved when handle is full-left on a horizontal slider, or full-bottom on a vertical slider. The range is 0 - 65534 (0x00 - 0xFFFE).
NAME="max" VALUE="number" The maximum value used as the argument given to the function(s) specified in href. Maximum value is achieved when handle is full-right on a horizontal slider, or full-top on a vertical slider. The range is 1 - 65535 (0x01 - 0xFFFF).
NAME="minAt" VALUE=""LEFT"|"RIGHT"|"TOP"|"BOTTOM"" Determines where the minimum value of the slider is located. As the handle sweeps from the minAt location, the value increases until the maximum value is reached at the opposite extreme of the minAt location. Default values are LEFT for horizontal sliders and BOTTOM for vertical sliders. The options are:
- LEFT The slider value increases from left to right. (horizontal slider only)
- RIGHT The slider value increases from right to left. (horizontal slider only)
- TOP The slider value increases from top to bottom. (vertical slider only)
- BOTTOM The slider value increases from bottom to top. (vertical slider only)
NAME="tickCount" VALUE="number"|"NONE"|"AUTO" The total number of tick marks along the slider channel. If NONE, no tick marks are visible. If AUTO, the number of tick marks is derived from the min and max values. If tickCount is not given, the default is NONE. The range is 0 - 255 (0x00 - 0xFF).
NAME="initialCondition" VALUE="number"|"FromInitHref" Specifies handle position when the page is loaded. The position value becomes the argument given to the href function(s). If FromInitHref is selected, the function specified by the InitHref attribute is called. The returned value determines the handle position. [The range is 0 - 65535 (0x00 - 0xFFFF).]
NAME="initHref" VALUE="function" Only valid if FromInitHref is used as the initialCondition. Specifies the function called when the page is loaded. The value returned from this function call will be used as the initial condition of the Slider handle. See Appendix B for all available functions.
NAME="waitForInit" VALUE="TRUE"|"FALSE" Only valid if FromInitHref is used as the initialCondition. Specifies if the Slider handle will wait for valid data before being displayed on the channel. If TRUE, the Slider handle will not display until the data from the initHref function is received. If FALSE, or the attribute is not present, the Slider handle momentarily starts at the minAt location until the initHref function receives its data.
NAME="handleOffset" VALUE="number" Specifies the number of pixels from the center of the channel the handle is located. If a vertical slider, positive numbers shift the handle to the right and negative numbers shift it to the left. If a horizontal slider, positive numbers shift the handle to the bottom and negative numbers shift it to the top. [The range is -100 through 100]
NAME="handleThickness" VALUE="number" The width (in pixels) of the handle if a horizontal slider, or the height of the handle if a vertical slider. If handleThickness is not given, the default is 11 pixels. The range is 4 - 255 (0x04 - 0xFF).
NAME="tickLength" VALUE="number" The length (size) of each tick mark, in pixels. The range is 1 - 255 (0x01 - 0xFF). If tickLength is not given, the default is 9 pixels.
NAME="tickPosition" VALUE="CENTER"|"TOP"|"BOTTOM"|"LEFT"|"RIGHT" The position of the tick marks in relation to the channel. . The range for a horizontal slider is CENTER, TOP or BOTTOM. The range for a vertical slider is CENTER, LEFT or RIGHT. If tickPosition is not given, the default is CENTER (inside the channel).
NAME="invisible" VALUE="TRUE"|"FALSE" Specifies if the Slider is to start out invisible or not. If the attribute is not present, then by default the Slider is visible. If the Slider starts out invisible, the only way to make it visible again is via the IWC method "reappear()".
NAME="orientation" VALUE="HORIZONTAL"|"VERTICAL" Specifies if the handle is to travel horizontally or vertically. The orientation parameter will override the orientation determined by the height and width dimensions entered in the APPLET CODE Attribute Field.
Use the Slider.class applet to create a Slider Widget. For example, to create a vertical slider that is 20 pixels wide and 170 pixels tall (without tick marks) that sends a minimum value of 0x00 and a maximum value of 0x05, initially starts with a value of 2 and sets external byte variable 6, use the following:
<APPLET CODE="Slider.class" WIDTH="20" HEIGHT="170" NAME="Slider1">
<PARAM NAME="href" VALUE="Amulet:UART.byte(6).setValue()">
<PARAM NAME="min" VALUE="0">
<PARAM NAME="max" VALUE="5">
<PARAM NAME="tickCount" VALUE="NONE">
<PARAM NAME="initialCondition" VALUE="2">
</APPLET>
See the \projects\Examples\BarGraph\ directory for an HTML file showing an example slider widget.
The String Field Widget calls a function that returns either a null-terminated string of ASCII characters, or a one-byte index into a list of pre-built strings. The string field can display a mixture of static text and a dynamic string. The static text is input using the standard C printf format. Like printf, the conversion specification begins with a % and ends with the conversion character "s".
If an ASCII string is received, then the acquired string is inserted where the conversion specification resides in the printf string. By default, the dynamic string can be a maximum of 25 characters in length. To increase the maximum number of characters, see precision below.
If a byte is received,
the pre-built string that has the same value as the acquired byte is inserted where the conversion specification
resides in the printf string. The values associated with each pre-built
string are specified similar to C's "enum" specifier, where the first string will have a value of 00,
the second item 01, etc, unless an explicit value is given. If not all values are specified, unspecified values
continue the progression from the last specified value.
If the width of the String Field widget is less than required, and the height of the string field widget is tall enough, the string will wrap automatically. If there is not enough room to wrap, the string will be truncated. User-defined wraps can be specified by entering "\n" within the static text, or by sending a 0x0A in the dynamic text, at the spot you would like the wrap to occur. There is a maximum of 20 wrapped lines per String Field.
If an upper ASCII character (0x80-0xFF) is to be sent as a dynamic string to the stringField over the UART, you must use the DLE (0x10) escape character. See the UART Protocol document for more specifics.
NAME="href" VALUE="function" The function called to retrieve the widget input. See Appendix B for all available functions for the String Field Widget. The function is called at an update rate specified by the updateRate attribute.
NAME="font" VALUE="font" Specifies the font used for the string field text. The corresponding .amf file must be included in the Amulet/Configuration/Fonts folder. See AmuletFontConverter for more information regarding the creation of .amf files. Default is Amulet Sans Serif.
NAME="fontSize" VALUE="1"|"2"|"3"|"4"|"5"|"6"|"7" Specifies the font size for the string field text. The assigned values are:
- 1 = 8-point font
- 2 = 10-point font
- 3 = 12-point font
- 4 = 14-point font
- 5 = 18-point font
- 6 = 24-point font Note: font size 6 for Amulet Sans Serif not supported.
- 7 = 36-point font Note: font size 7 for Amulet Sans Serif not supported.
NAME="fontStyle" VALUE="PLAIN"|"BOLD"|"ITALIC"|"UNDERLINE"|"STRIKE" Specifies the style associated with the string field font. To create a custom look, styles can be combined by using the "logical or" (|). However, PLAIN overrides any other style. The available font styles are:
- PLAIN The option text uses the standard font.
- BOLD The option text is bold. (i.e. text)
- ITALIC The option text is italicized. (i.e. text)
- UNDERLINE The option text is underlined. (i.e. text)
- STRIKE The option text is stricken through. (i.e.
text)This attribute defines the default font style of both the static text defined in the printf attribute as well as the dynamic string returned from the href function. If it is desired to change the dynamic string's font style at run time, see the UART Protocol documentation regarding the font style escape byte.
NAME="verticalAlign" VALUE="TOP"|"MIDDLE"|"BOTTOM" Specifies the vertical alignment of the string associated with the printf attribute within the String Field dimensions. Only one value is allowed; you cannot mix vertical alignments. Default is TOP.
NAME="horizontalAlign" VALUE="LEFT"|"CENTER"|"RIGHT" Specifies the horizontal alignment of the string associated with the printf attribute within the String Field dimensions. Only one value is allowed; you cannot mix horizontal alignments. Default is LEFT.
NAME="colorInvert" VALUE="REGION"|"STRING"|"NONE" Specifies if the string is shown as reverse video or not. If REGION selected, the entire region (including the text) of the String Field will be inverted. If STRING selected, only the text will be inverted. If NONE selected, String Field will not be inverted. Only one value is allowed; you cannot mix color inversion properties. Default is NONE.
NAME="printf" VALUE="text %format text" Specifies the text and the formatted string field to be displayed (similar to the standard C program printf command). The string is input using the standard C printf format. Like printf, the conversion specification begins with a % and ends with the conversion character "s". By default, the dynamic string can be a maximum of 25 characters in length. To increase the maximum number of characters, see precision below. Between the % and the conversion character there may be, in order:
NOTE ON WRAPPING: If the width of the String Field widget is less than required, and the height of the string field widget is tall enough, the string will wrap automatically. If there is not enough room to wrap, the string will be truncated. User-defined wraps can be specified by entering "\n" within the static text, or by sending a 0x0A in the dynamic text, at the spot you would like the wrap to occur. There is a maximum of 20 wrapped lines per String Field.
The following table shows the effect of a variety of specifications in printing "hello, world" (12 characters). We have put colons around each field so you can see its extent.
:%s: :hello,
world:
:%10s: :hello, world:
:%.10s: :hello, wor:
:%-10s: :hello, world:
:%.15s: :hello, world:
:%-15s: :hello, world :
:%15.10s: : hello, wor:
:%-15.10s: :hello, wor :
NOTE: To display a literal % symbol in the string field, use a double percent command in the string (e.g. %s at 100 %% displays your string at 100 %). To display a literal \ symbol in the string field, use a double backslash command in the string (e.g. %s \\ 100 displays your string \ 100).
NAME="options" VALUE="string1,string2,string3,(etc...)" Specifies the strings that can be displayed when using Amulet:UART.byte(x).value(). All strings are comma delimited. Note: Any spaces before or after the commas are included in the text string. To specify a value associated with a static string, append "= xxx" to the individual titles; (where xxx is a number from 0 - 255 or 0x00 - 0xff). For example, VALUE="string1=0x01,string2=0x10, (etc...)" The string whose intrinsic value equals the value returned from the byte(x).Value() function is displayed.
NAME="initialCondition" VALUE="string" Specifies which options string is initially used when the page is loaded. It is acceptable to use the options and initialCondition attributes even when requesting the Amulet:UART.string(x).value(). The default string will be used until a valid string is received.
NAME="border" VALUE="number" Specifies width, in pixels, of the border around the dimensions of the string field. Default is 0, meaning no border.
NAME="waitForInit" VALUE="TRUE"|"FALSE" Specifies if the String Field will wait for valid data before being displayed on the LCD. If TRUE, the String Field will not display any text, static or dynamic, until the first packet of data is received. If FALSE, or the attribute is not present, the String Field starts out displaying only the static text, if any specified, until the first packet of data is received.
NAME="updateRate" VALUE ="1st number, 2nd number" The first number specifies the href function call frequency (specified in seconds, with a single floating-point number). The range is 0.00 - 655.35. A value of 0.00 means update never. The second number specifies the delay time from when the page is loaded until the first href function call (specified in seconds, with a single floating-point number). The range is 0.01 - 655.35. If the second number is not specified, then the delay time defaults to the first number (frequency).
NAME="delimiter" VALUE="char" Specifies the delimiter of strings in the options attributes. You can specify any single ASCII character as the string delimiter. However, you MUST make sure the character is not used in any of your strings. The default delimiter is ",".
NAME="equalSign" VALUE="char" Specifies the delimiter of string values in the options attributes. You can specify any single ASCII character as the string value delimiter. However, you MUST make sure the character is not used in any of your strings. The default delimiter is "=".
NAME="invisible" VALUE="TRUE"|"FALSE" Specifies if the String Field is to start out invisible or not. If the attribute is not present, then by default the String Field is visible. If the String Field starts out invisible, the only way to make it visible again is via the IWC method "reappear()".
Use the StringField.class applet to create a string field. For example, to create a String Field that uses the 14-point bold, italicized, Amulet Sans Serif font, and calls external string variable 3 at an update rate of 330ms, use the following:
<APPLET CODE="StringField.class" WIDTH="160" HEIGHT="25" NAME="SF1">
<PARAM NAME="href" VALUE="Amulet:UART.string(3).value()">
<PARAM NAME="fontSize" VALUE="4">
<PARAM NAME="fontStyle" VALUE="BOLD|ITALIC">
<PARAM NAME="printf" VALUE="User ID: [ %s ]">
<PARAM NAME="updateRate" VALUE=".33,0.01">
</APPLET>
For example, to create a string field that uses the 14-point bold, italicized, Amulet Sans Serif font, and calls external byte variable 3 to index one of 3 strings only once 10ms upon loading the page, use the following:
<APPLET CODE="StringField.class" WIDTH="160" HEIGHT="25" NAME = "SF2">
<PARAM NAME="href" VALUE="Amulet:UART.byte(3).value()">
<PARAM NAME="fontSize" VALUE="4">
<PARAM NAME="fontStyle" VALUE="BOLD|ITALIC">
<PARAM NAME="printf" VALUE="User ID: [ %s ]">
<PARAM NAME="options" VALUE="Jim=0x11,Ken=0x22,Ed=0x33">
<PARAM NAME="initialCondition" VALUE="Jim">
<PARAM NAME="updateRate" VALUE="0,0.01">
</APPLET>
See the \projects\Examples\StringField\ directory for an HTML file showing an example string field widget.
Back to Welcome - Contact Amulet - Amulet Home